User Guide
IEM Manager is a gear tracking app for production sound crews in film and TV. This guide walks you through every feature, from your first sign-in to running multi-day shoots with a full team.
01Welcome
If you've ever ended a day on set wondering where the spare headphone went, who's keeping which radio overnight, or trying to reconcile a paper checkout list against what actually came back — IEM Manager is for you.
It runs on iOS and Android, syncs in real time across your team via the cloud, and stays out of your way during the shoot. You scan a barcode or tap an NFC tag, assign the gear to someone, and move on. The diary builds itself.
This guide is organised in the order you'll most likely use the app: sign in, set up a project, add gear and people, then run your workday. Use the navigation on the left to jump around.
02Getting started
Sign in
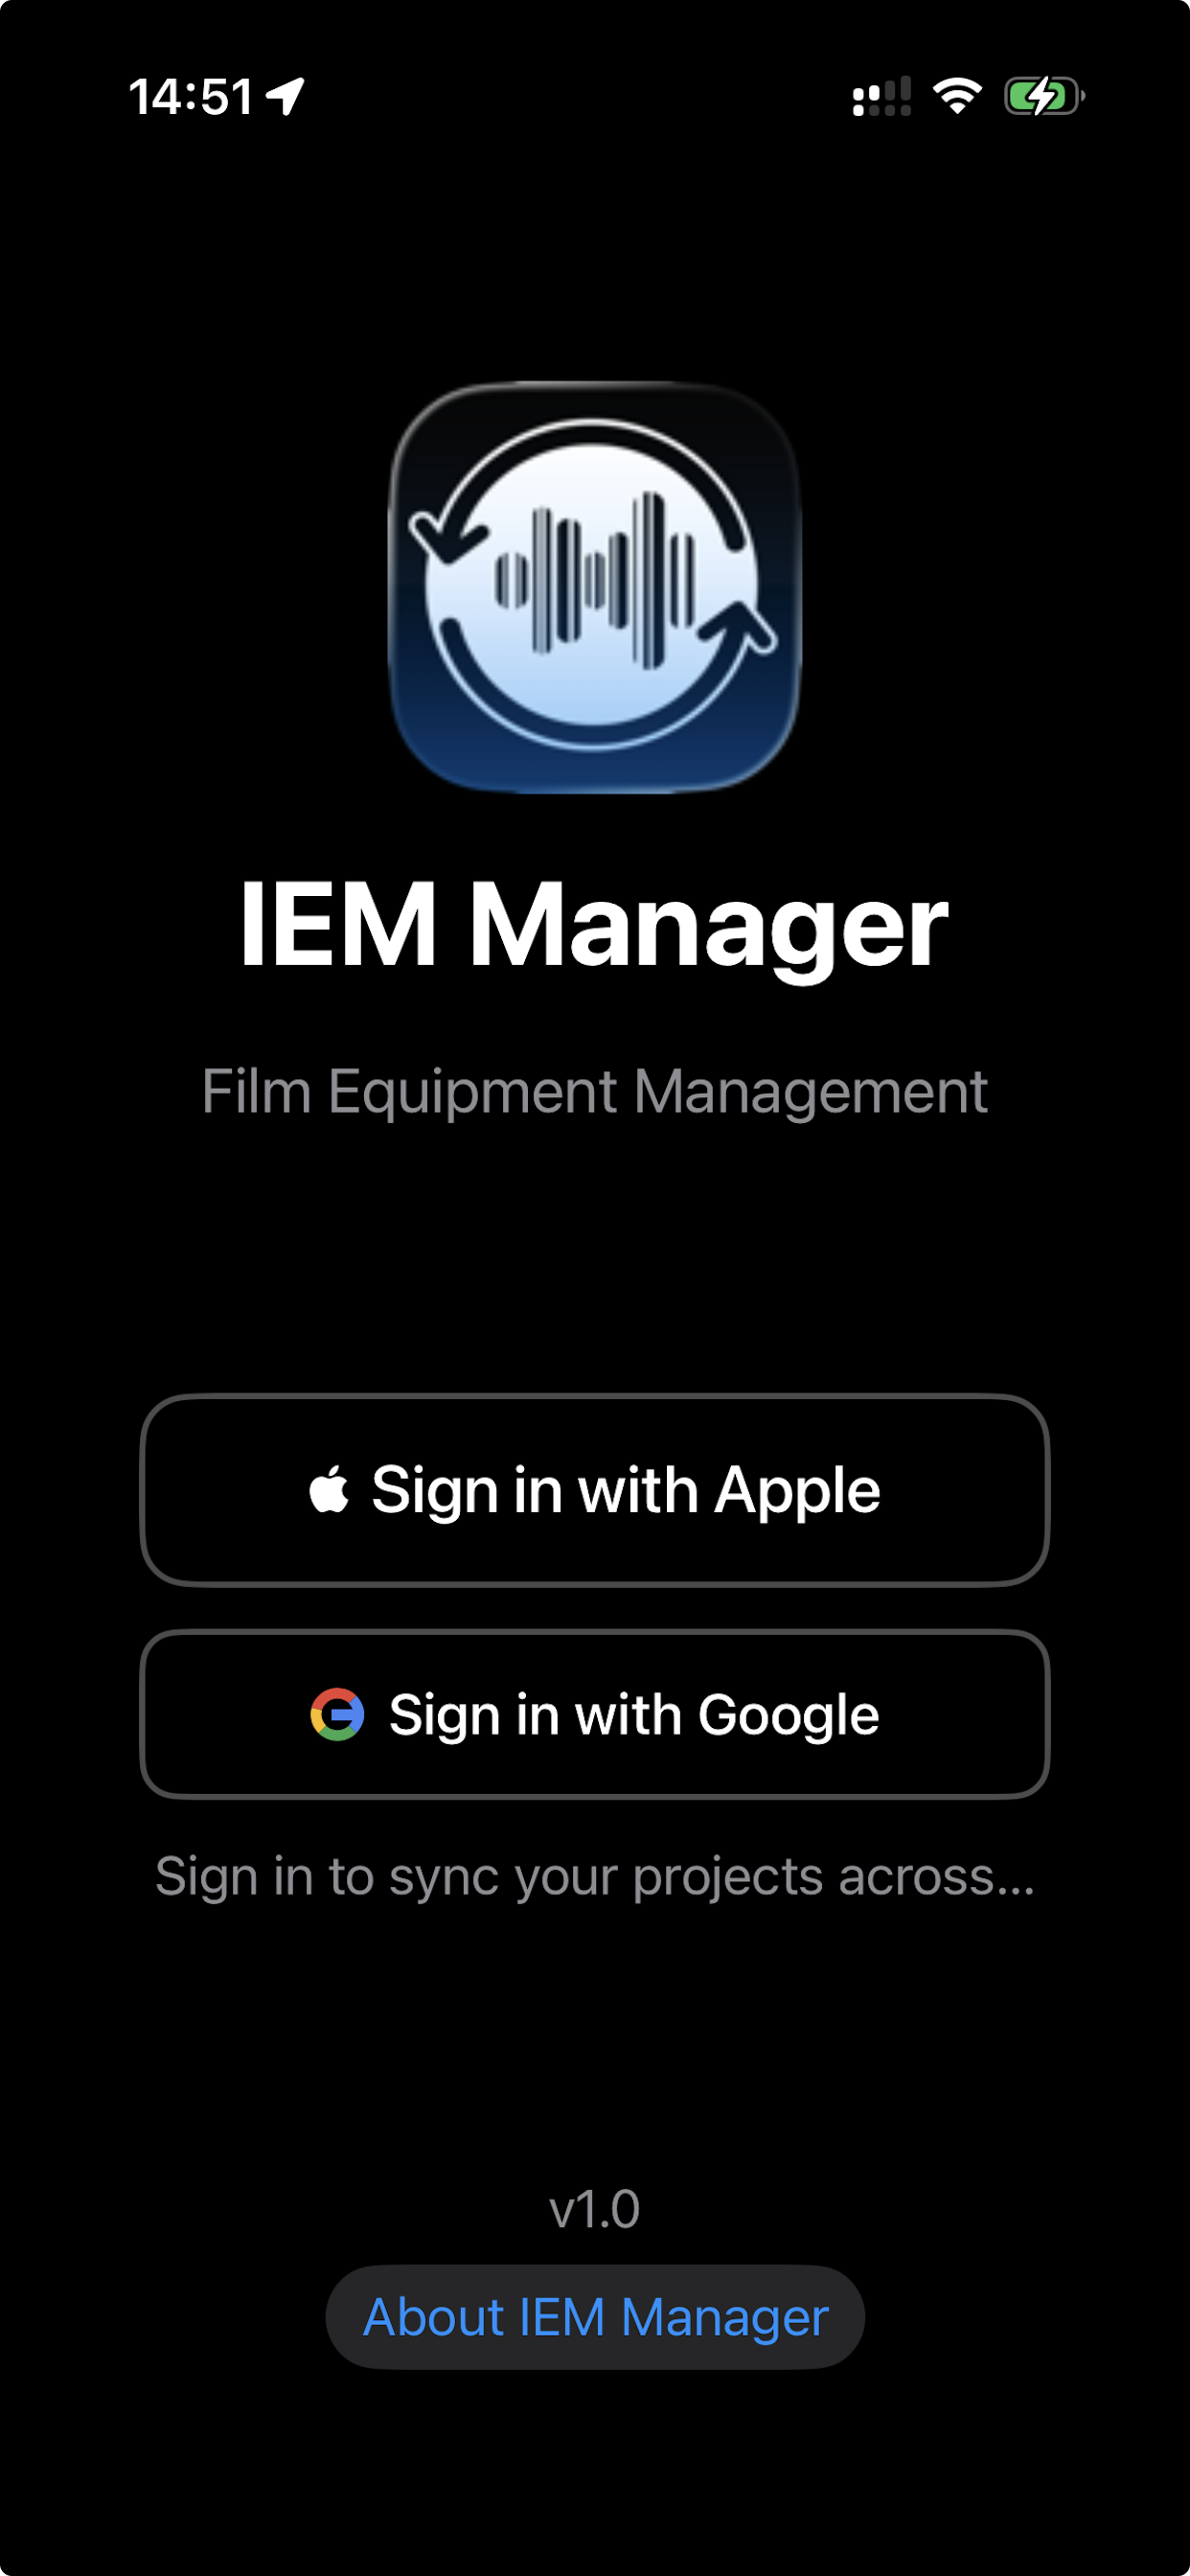
Open IEM Manager and you'll see two options: Sign in with Apple or Sign in with Google. There is no email/password registration — authentication relies entirely on your existing Apple ID or Google account, which keeps things secure and removes the need to manage another password.
The account you sign in with is the one your data syncs to, across every device you install IEM Manager on (iPhone, iPad, Android phone, tablet). You can switch devices freely; your projects follow you.
The 30-day free trial
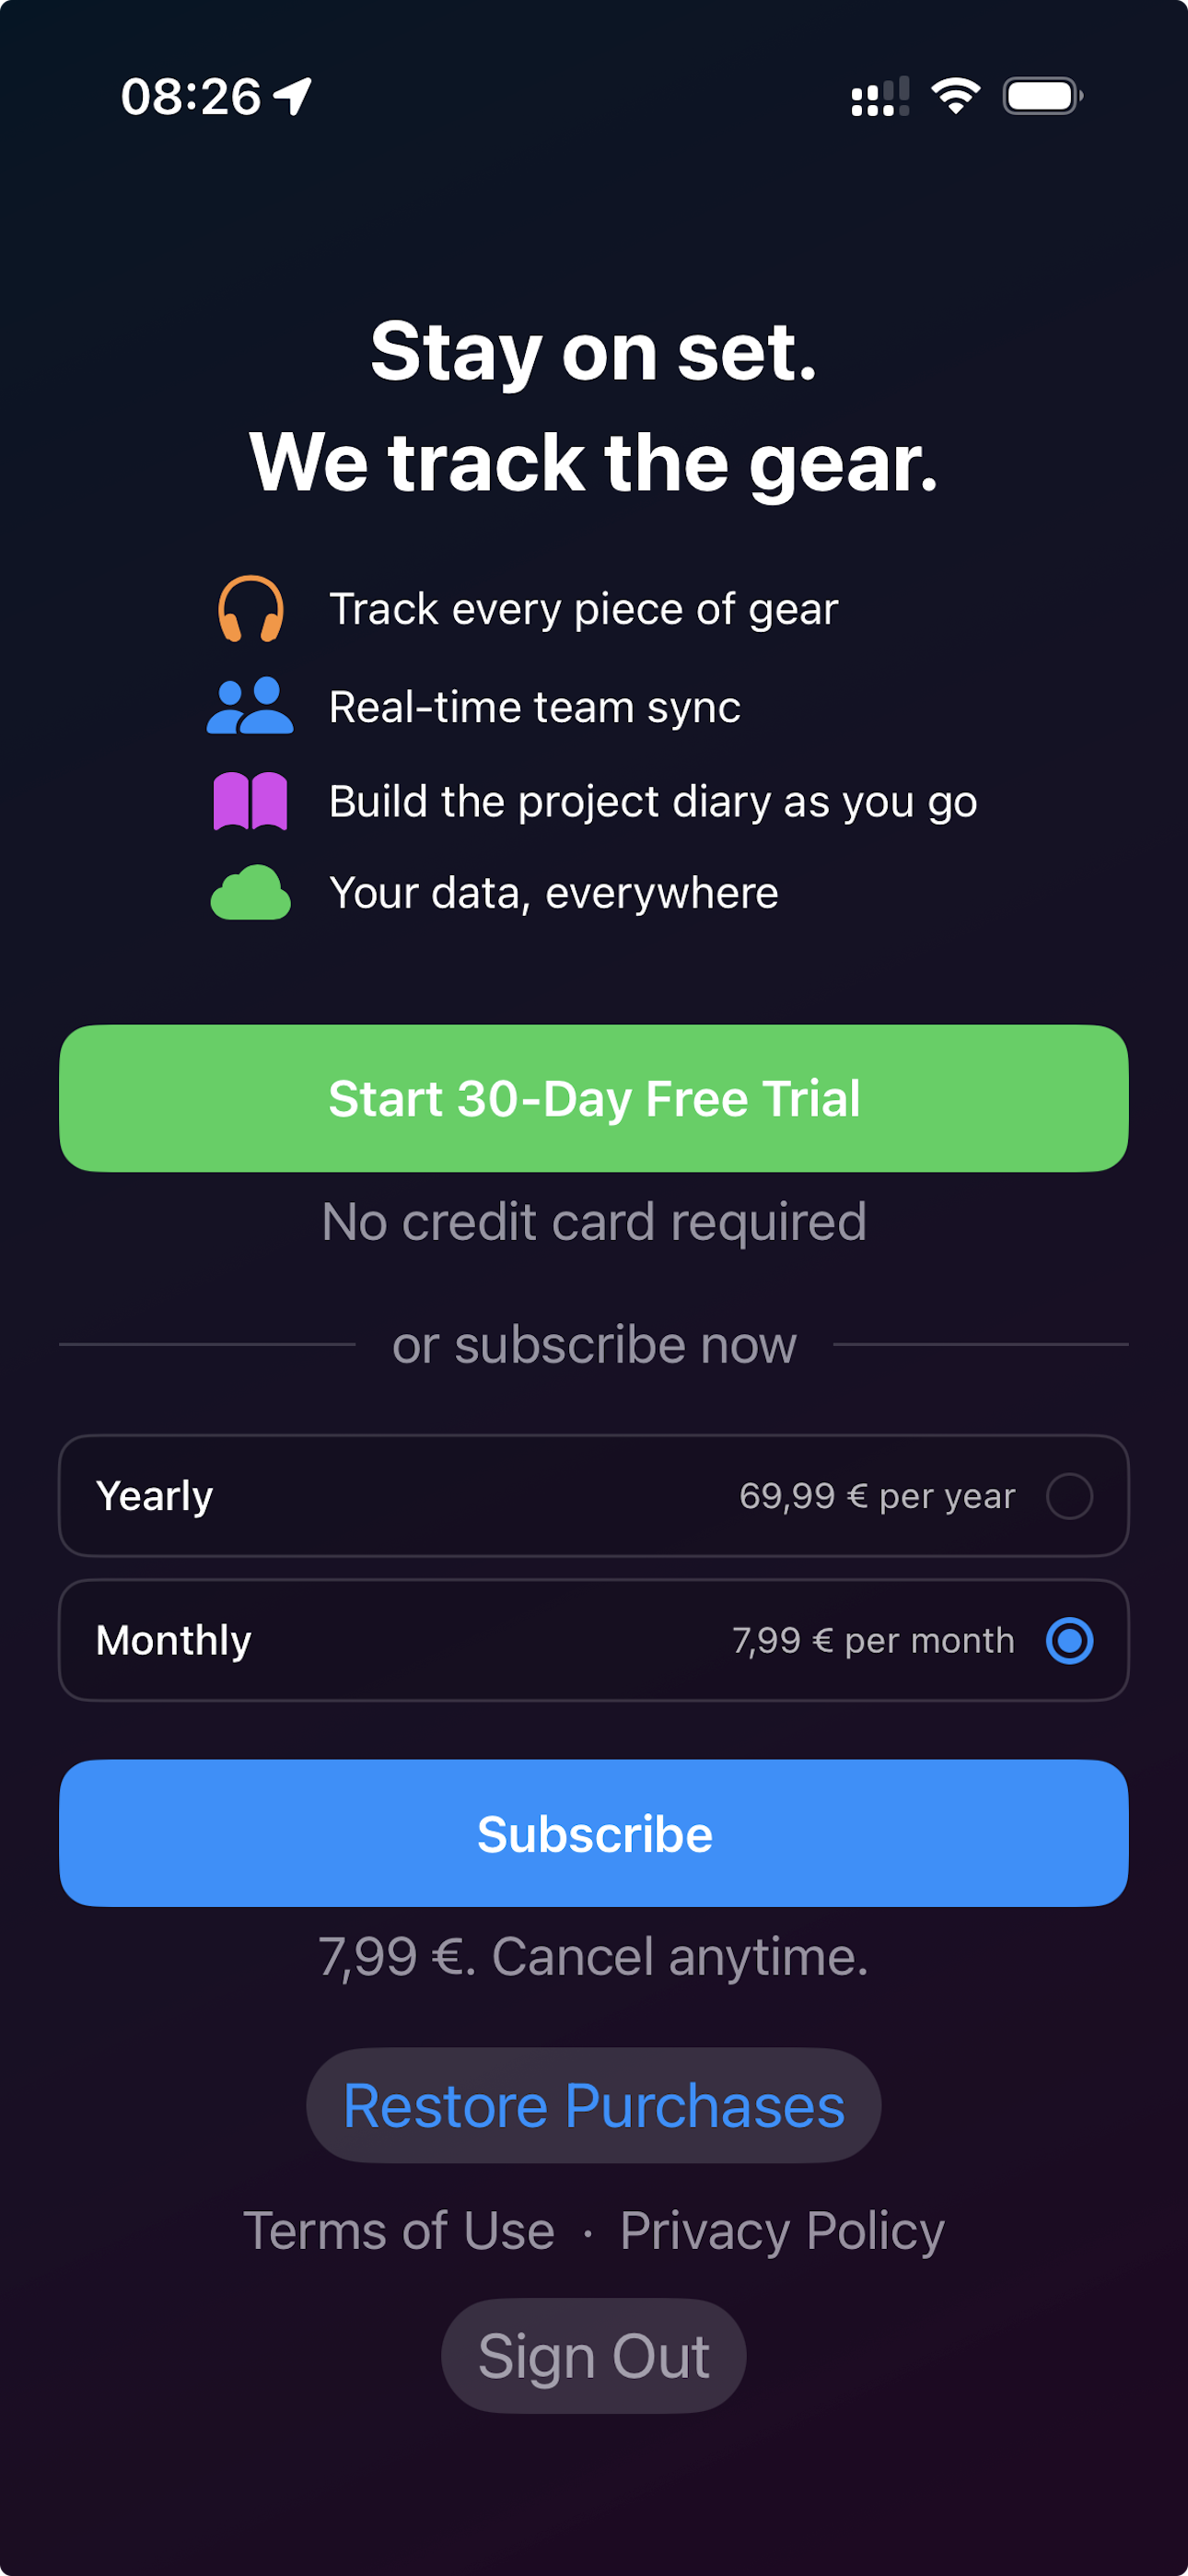
On your very first sign-in, IEM Manager offers a 30-day free trial with no credit card required. Tap Start 30-Day Free Trial and you get unrestricted access to every feature for thirty days.
If you'd rather skip the trial and subscribe immediately, the same screen lets you pick a Yearly or Monthly plan. The free trial does not auto-convert into a paid subscription — when the 30 days end, you'll be asked to subscribe, but you'll never be charged silently.
Why no credit card? We think you should know whether the app fits your workflow before paying anything. The trial gives you a real shoot's worth of time to decide.
03Key concepts
IEM Manager is built around a small number of clear concepts. Understanding them up-front makes everything else obvious.
| Term | What it means |
|---|---|
| Project | The container for everything related to a single production: gear, people, days, and movements. Most of the time, one shoot = one project. |
| Equipment | A single piece of gear (a headphone, a receiver, a timecode box). Each item has a unique serial number used as the scan code. |
| Person | Someone who can borrow gear: an actor, a DOP, a stand-in. Persons exist within a project. |
| Workday | A single day of shooting. The app creates one automatically the first time you scan something out each day, and you "wrap" it at the end. |
| Movement | A single event: an item going OUT or coming IN, with a timestamp and a person attached. Movements stack up to form the diary. |
| Assignment | The rule attached to a check-out: Daily for a normal one-day loan, Regular to remember a recurring assignment, or Keep It for long-term loans. |
| Team | The other IEM Manager users who have access to your project. Each has a role (Admin or User). |
04Creating a project
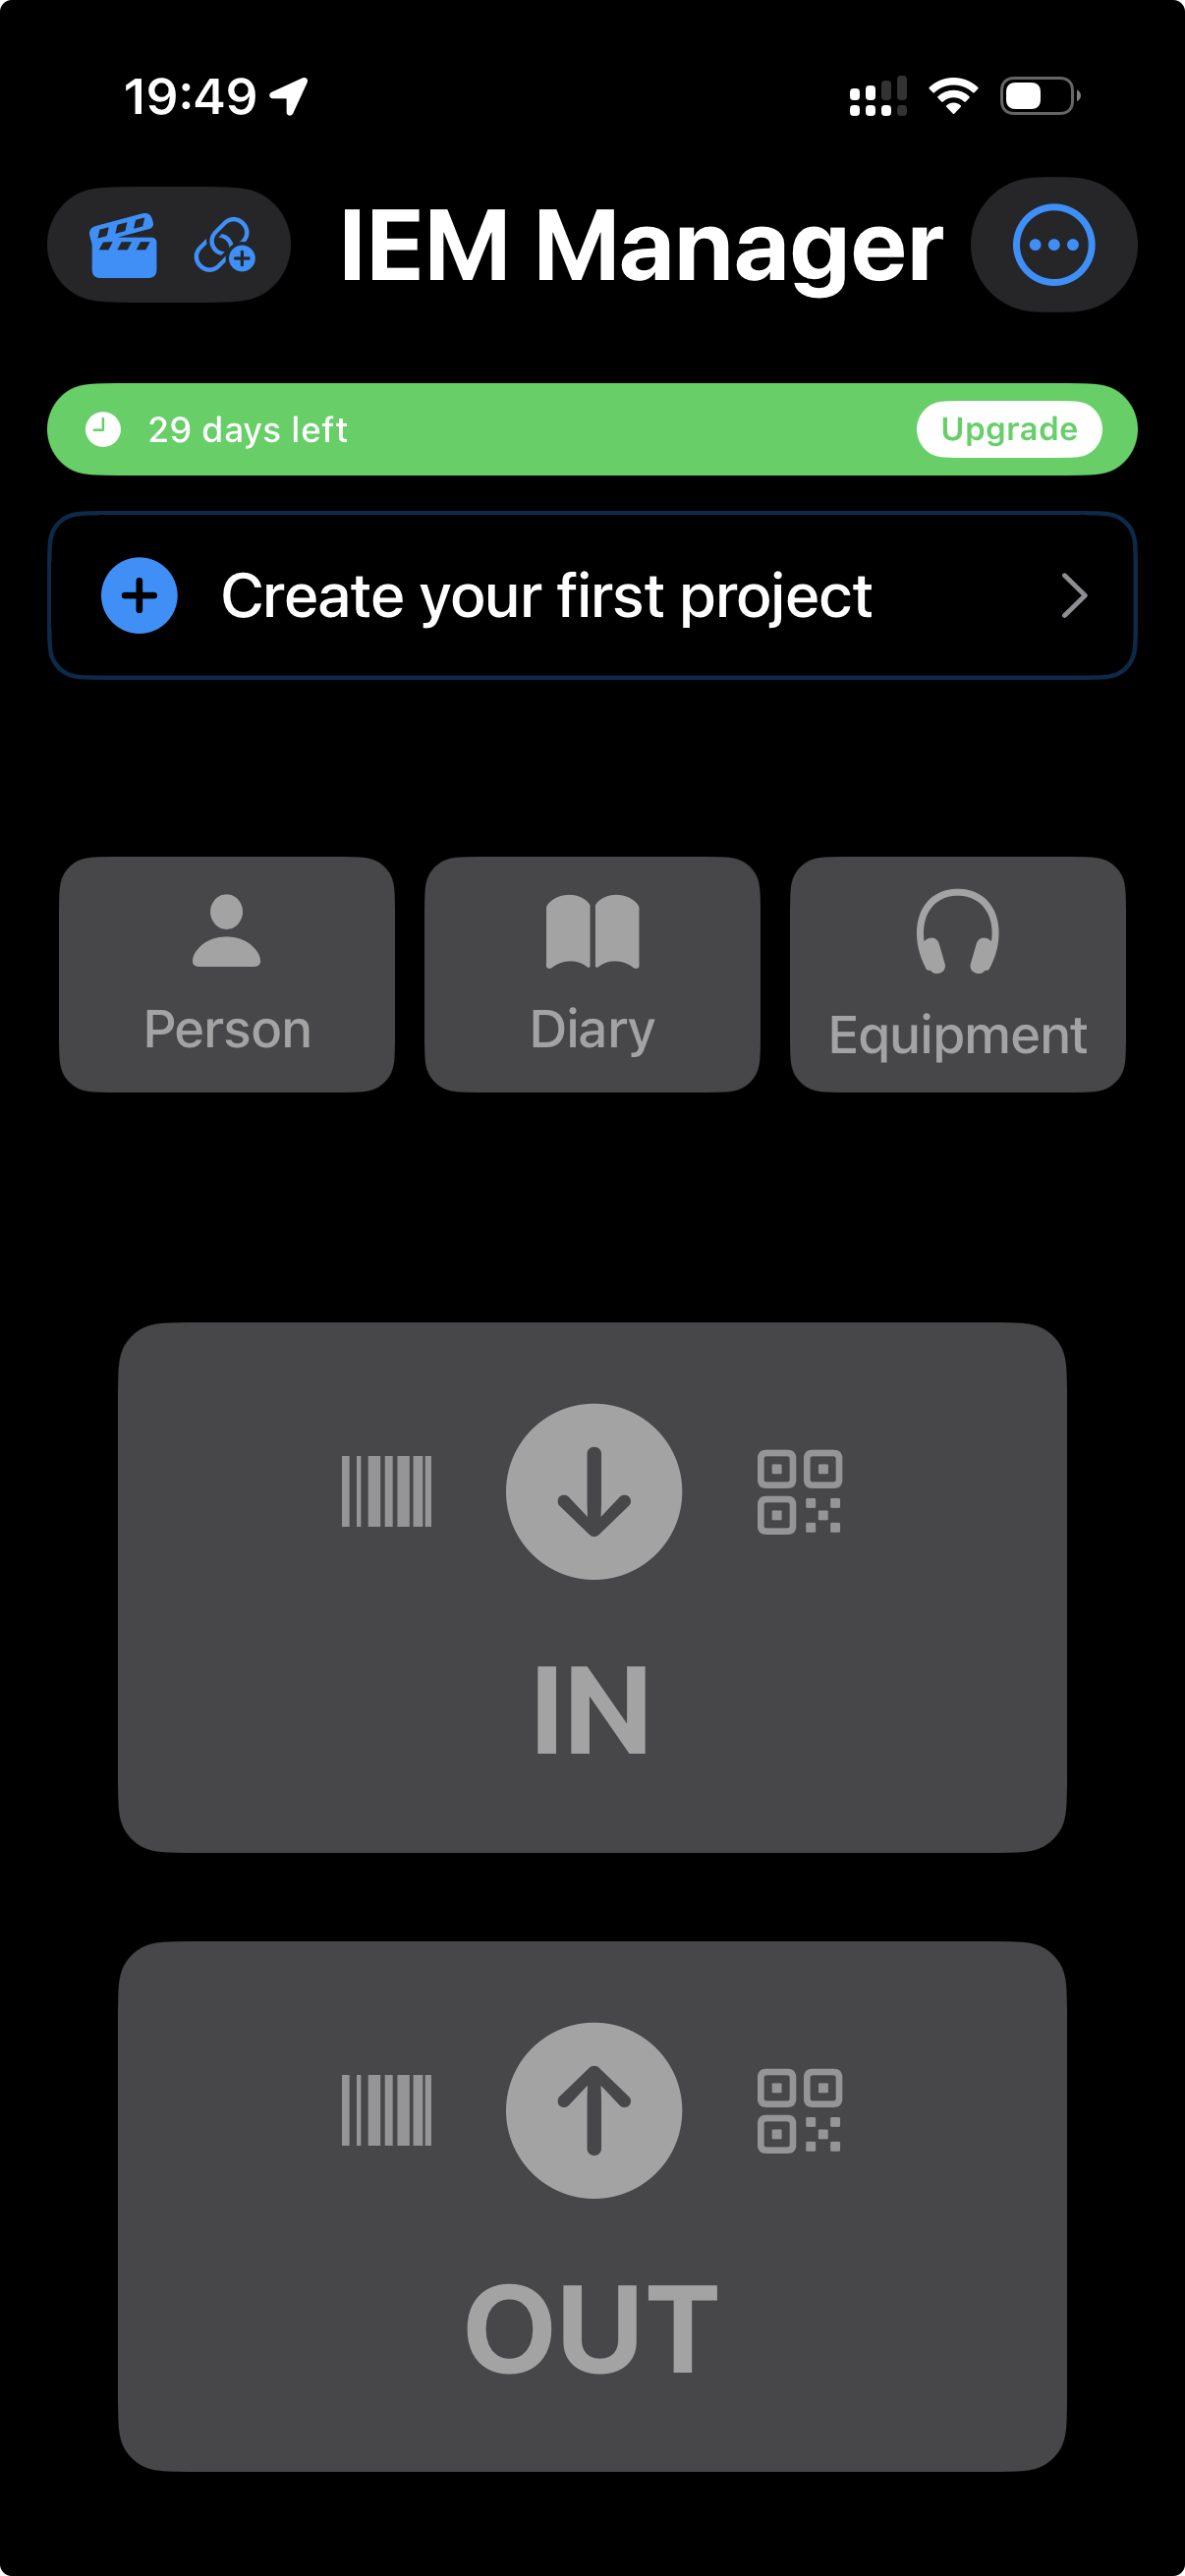
The first thing you'll see after signing in (assuming you've started your trial) is an empty home screen with a green trial banner and an invitation to Create your first project. Tap it.
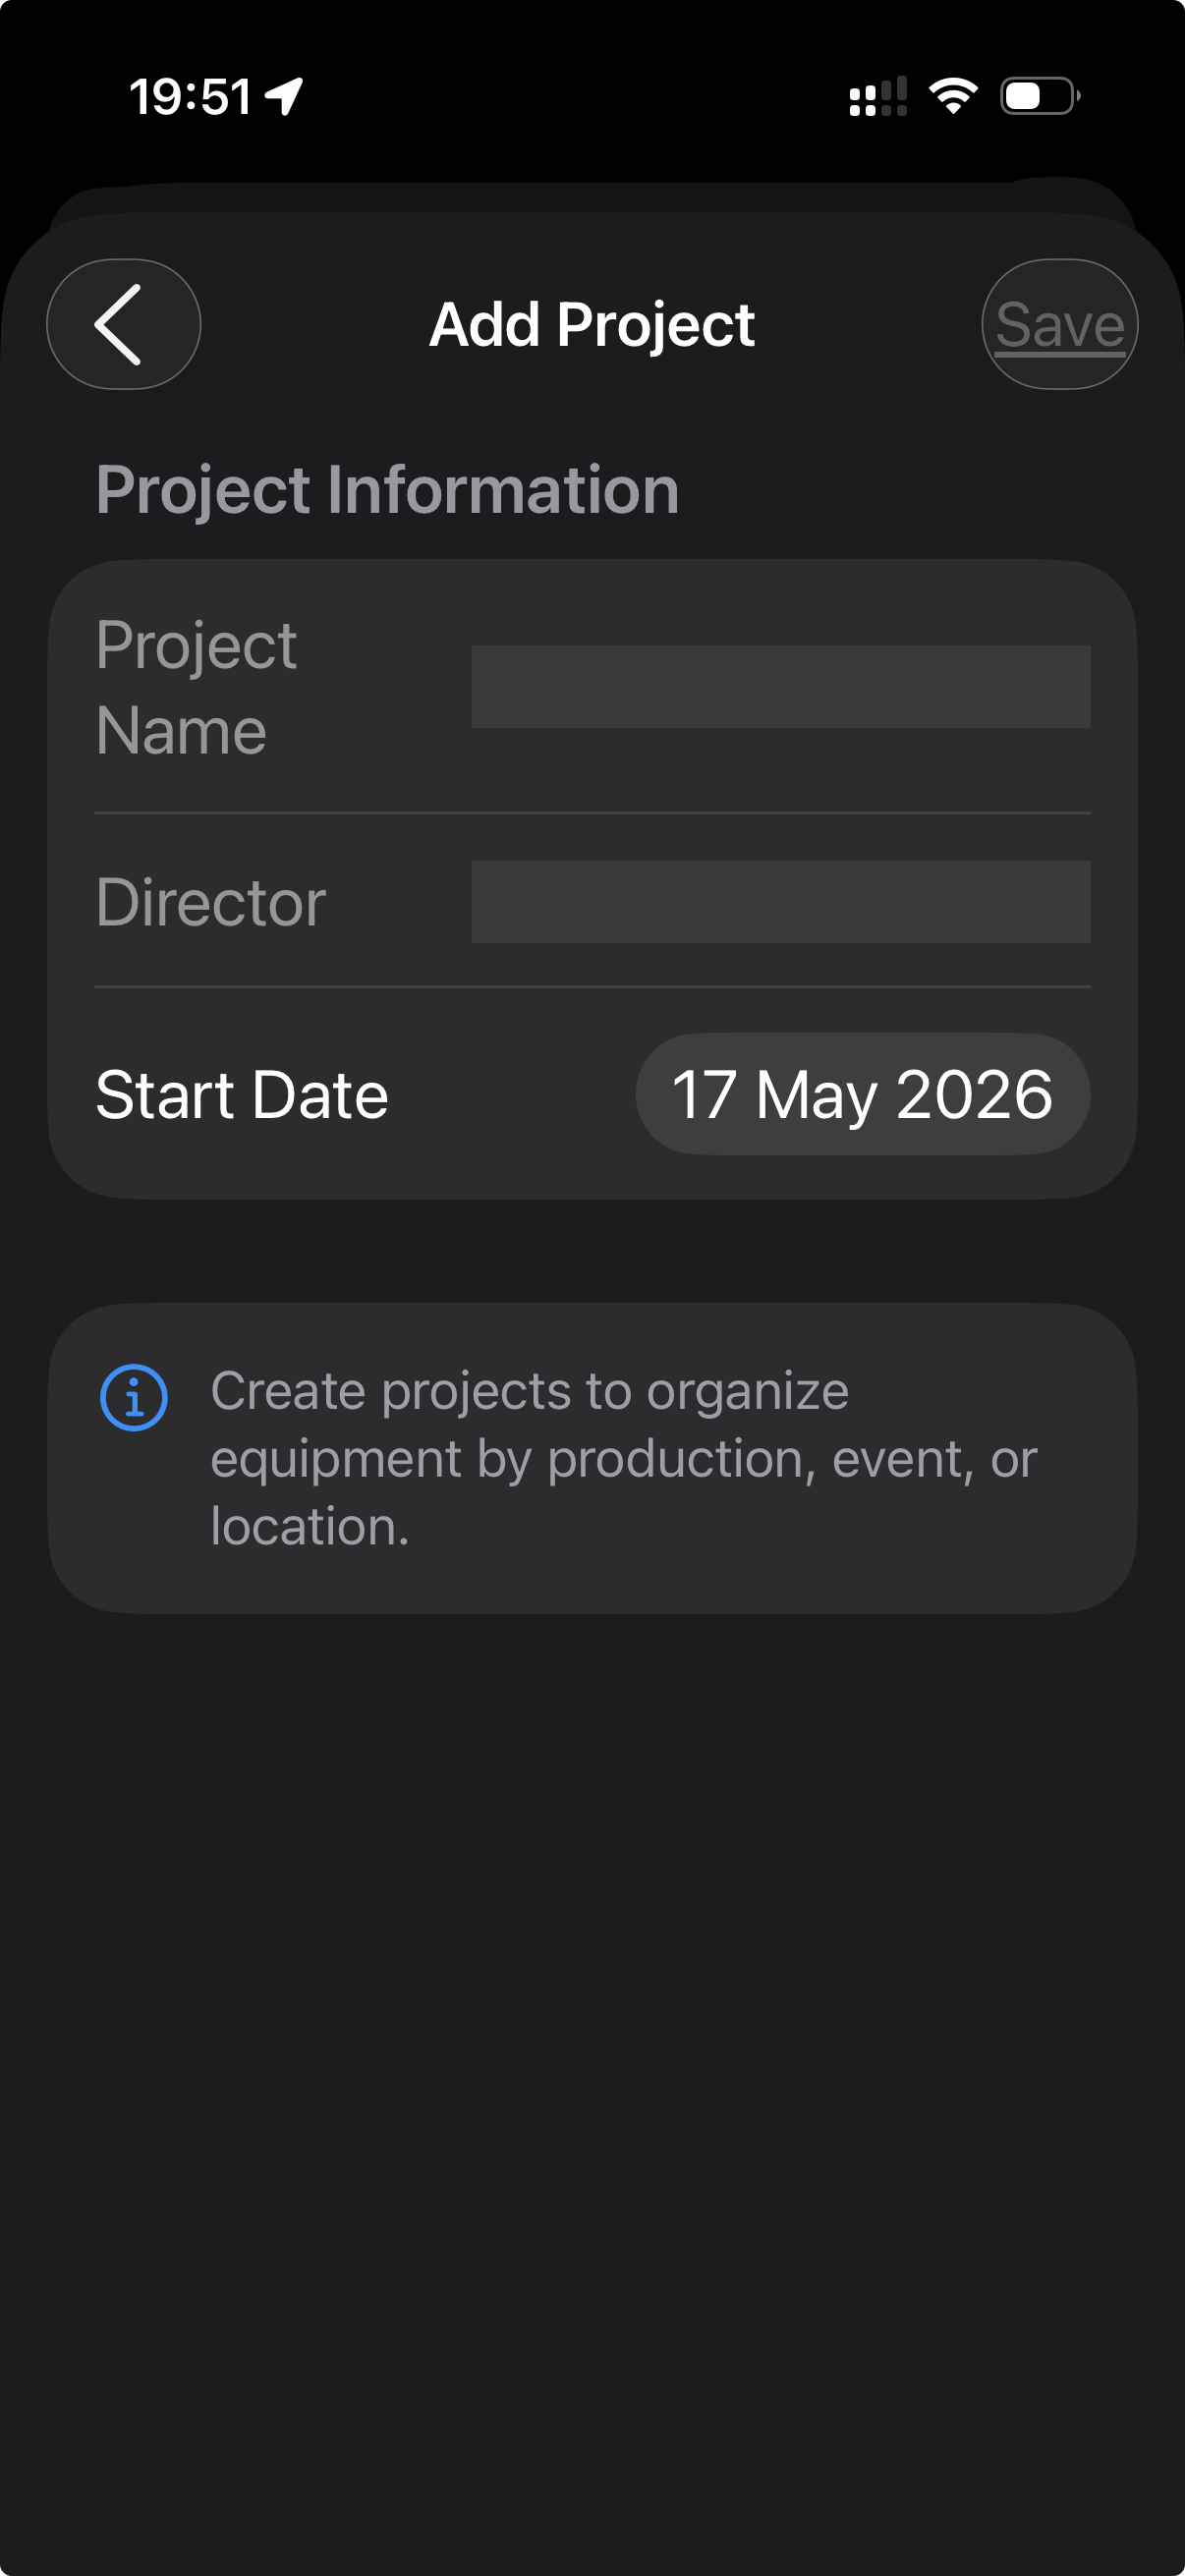
You only need three things to create a project:
- Project name — usually the production title.
- Director — optional, but useful for paperwork.
- Start date — defaults to today.
Hit Save and you're in. The project is created in the cloud and becomes immediately available to anyone you later invite.
Switching between projects
If you run multiple shoots in parallel, you can have several projects in IEM Manager. The selected project is shown at the top of the home screen with a green check mark; tap the project card to switch.
05Building your inventory
Once your project exists, tap the orange Equipment tile on the home screen to open your inventory. New projects start empty — tap the + in the top right to add your first piece of gear.
Each item needs a type (headphone, receiver, IEM, timecode box, etc.), a display name and a serial number. The serial number is what the scanner matches against, so make sure it's unique within your project.
Status badges
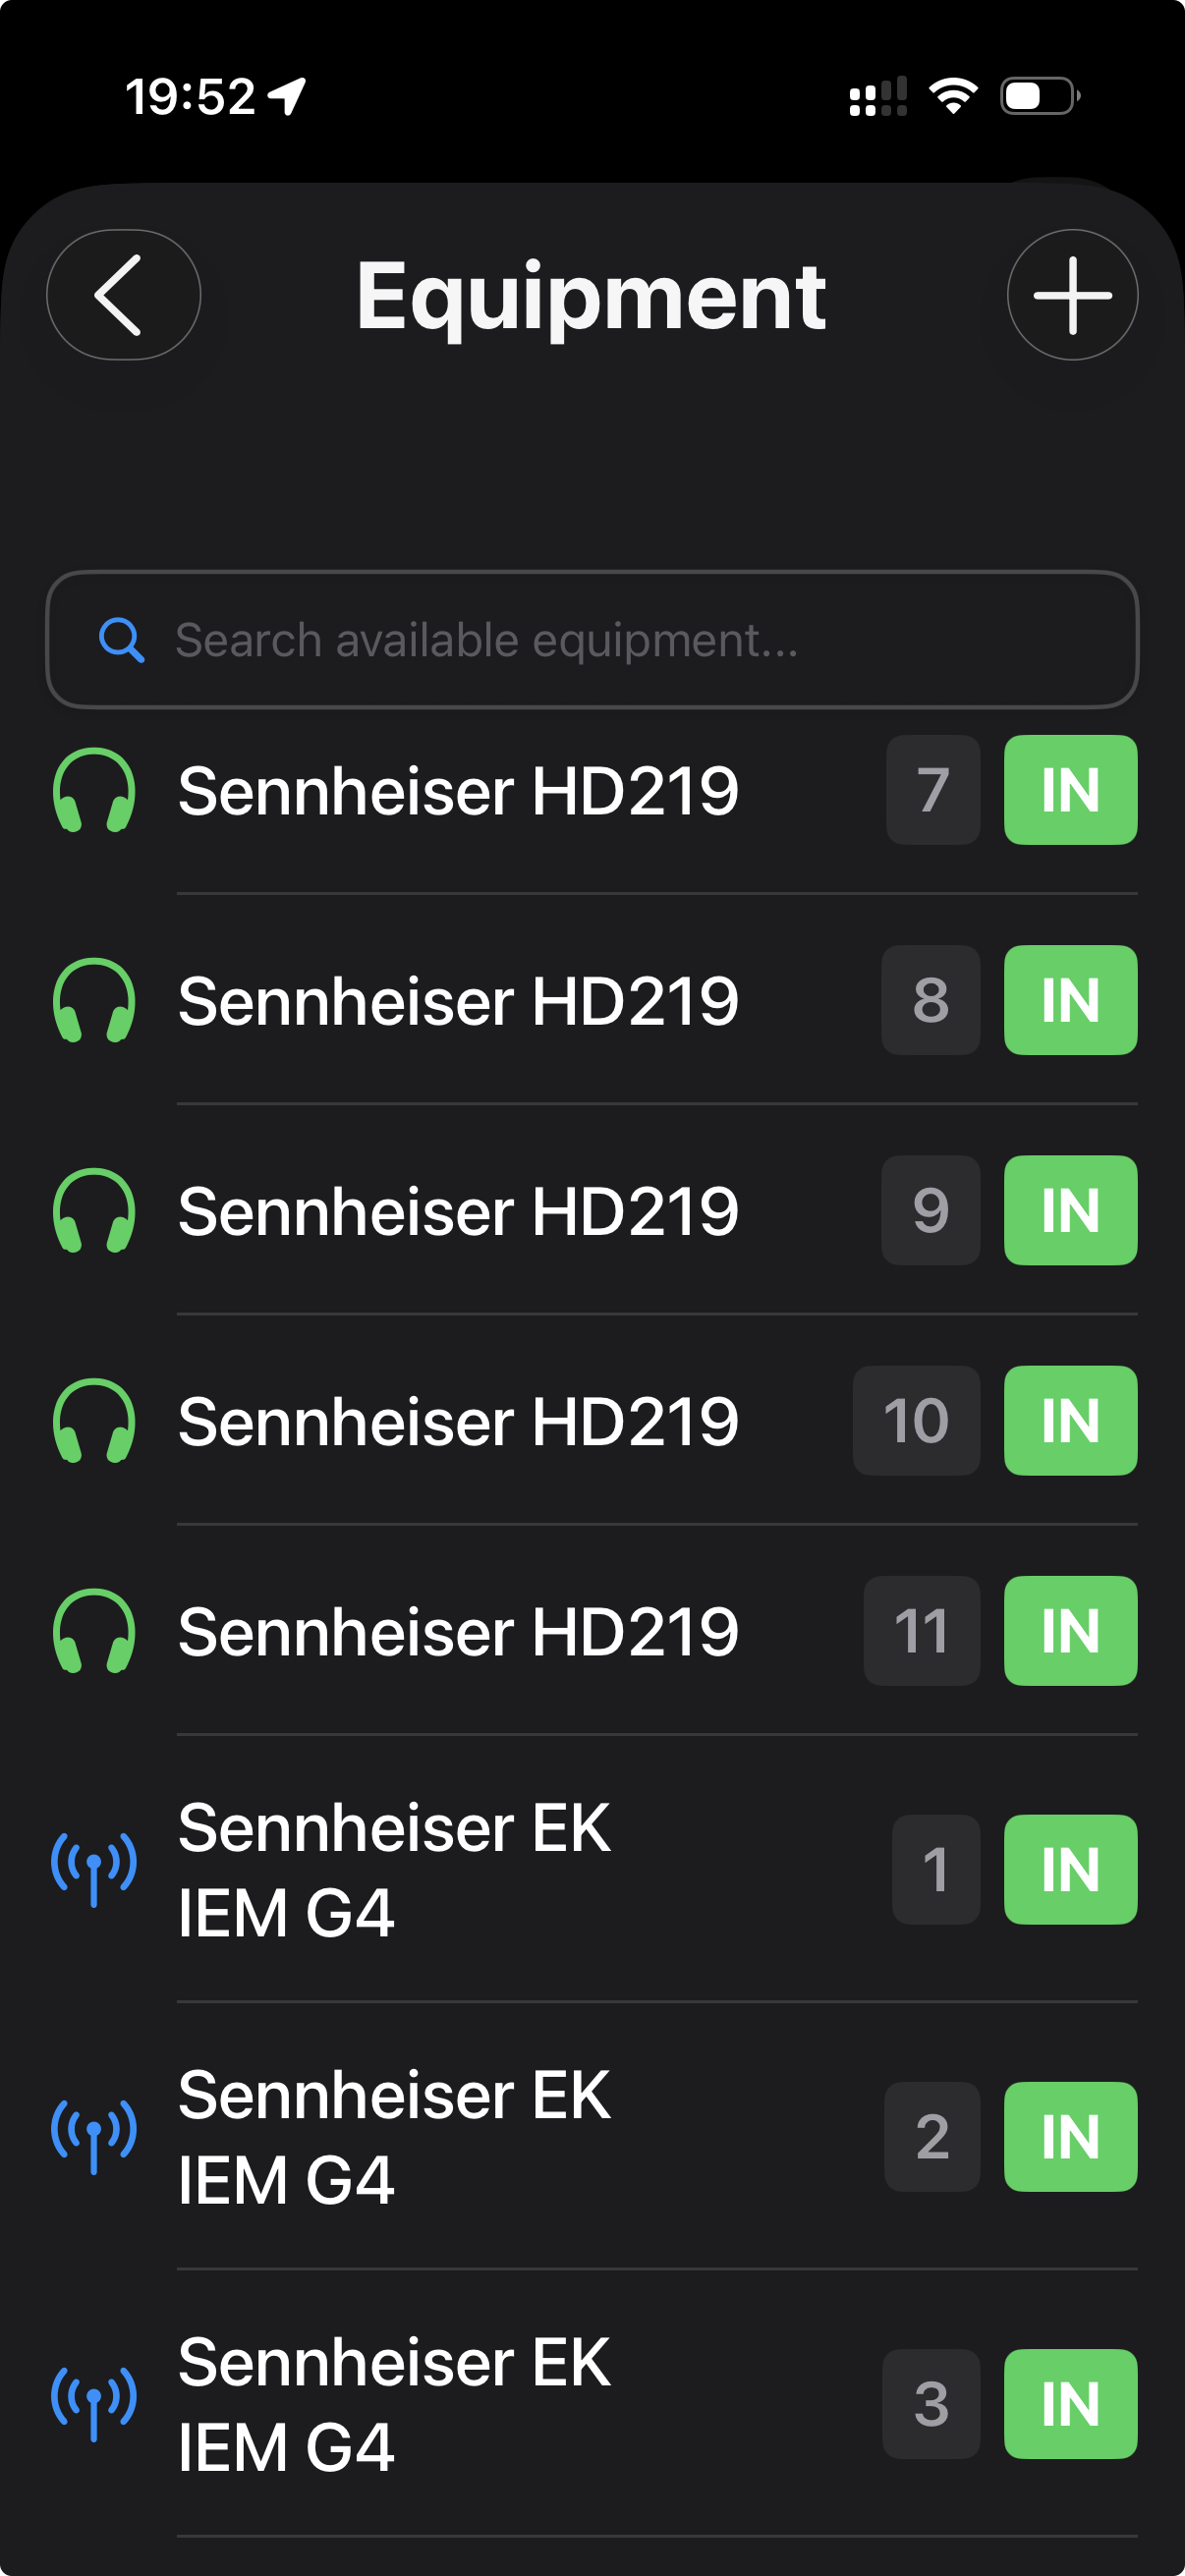
Once gear is in your inventory, each row shows a coloured badge on the right indicating its current state:
- IN Available — currently in the bag, not assigned to anyone.
- OUT Checked out — currently with someone, with the person's name shown.
You can search the inventory using the search field at the top of the list. The list shows numbered duplicates (e.g. Sennheiser HD219 #7, #8, #9) when you own multiple units of the same model.
Adding gear quickly
When you tap + to add equipment, the scanner can pre-fill the serial number for you — just scan the barcode on the device's label and type the model name. For a 50-piece kit, this takes about 15 minutes the first time, and never again.
06Managing persons
People are the other half of the equation. Each item that goes out goes out to someone — and the diary tracks who has what.
Tap the blue Person tile on the home screen to open the people list. Add people manually with the + button: first name, last name, function (boom op, actor, DOP, sound mixer…), and optionally email and phone.
Quick-add during a check-out
You don't have to pre-populate everyone before the shoot. When you check gear out and start typing a name in the allocation field, if the person doesn't exist yet, a blue Person button appears next to the field — tap it to create the person on the fly with just a name. You can complete their profile later.
07Team & roles
If you're working solo, you can skip this section. But on most shoots, several crew members need to interact with the same project at once — typically one or two sound assistants in addition to the mixer.
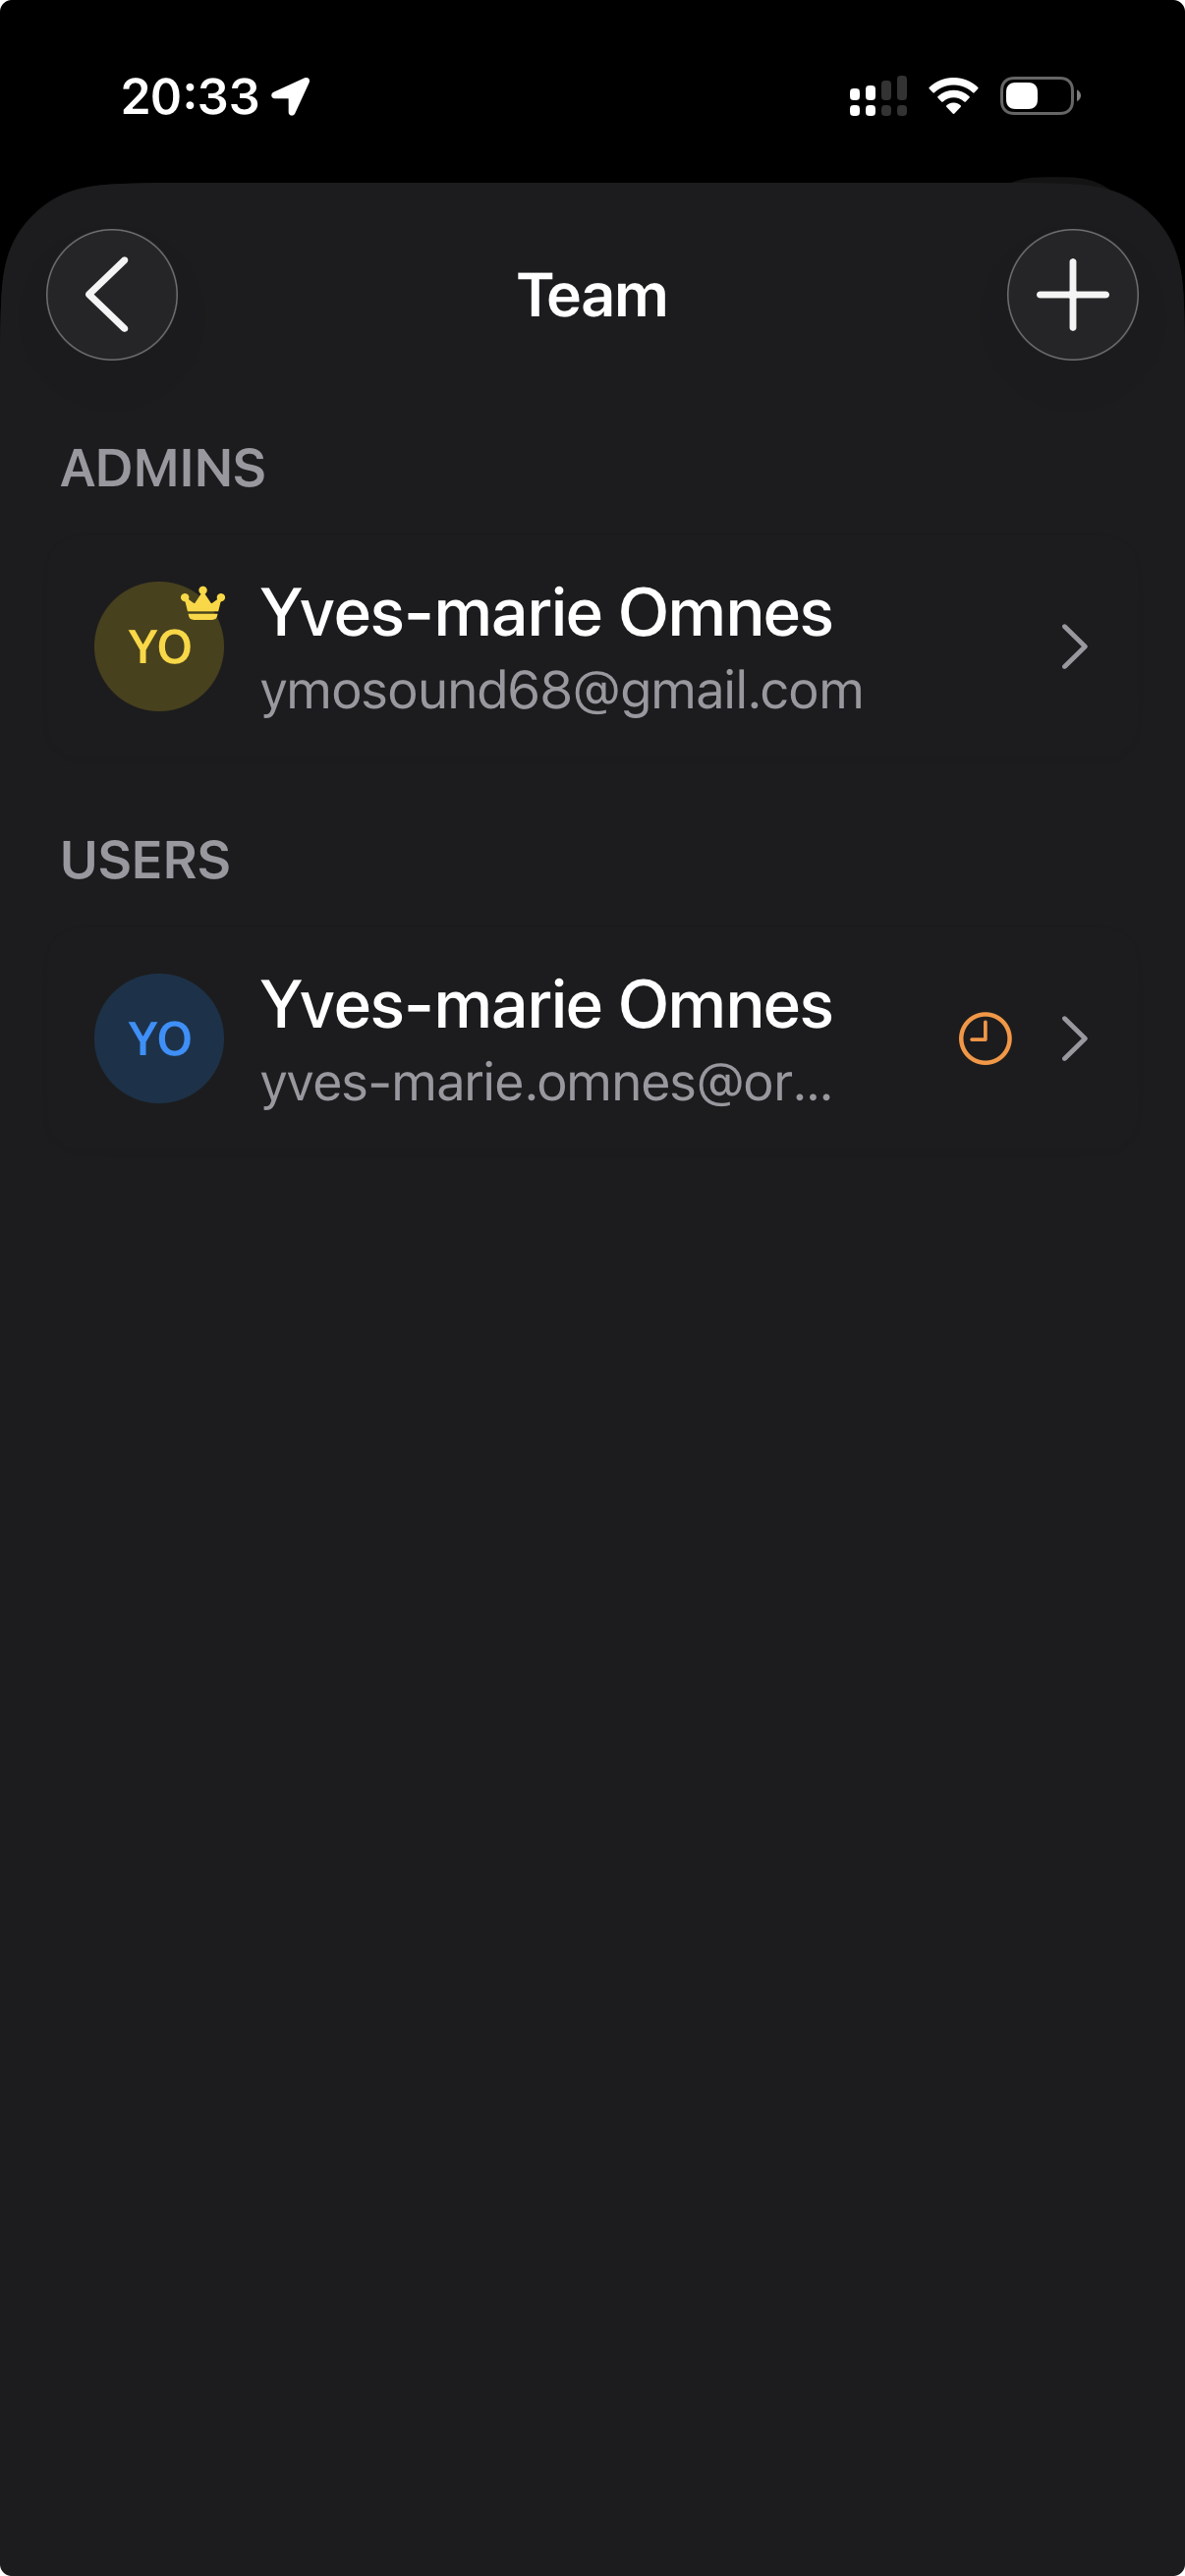
Open the project's Team view from the top of the home screen. You'll see two groups:
- Admins — can edit gear, persons, limits, rates, and invite or remove team members. The original project creator has a gold crown and cannot be removed.
- Users — can check gear in and out, but cannot modify the inventory or the team.
Inviting someone
Tap the + in the Team view. Enter the email address the person uses for their Apple or Google sign-in. The invitation will appear on their device as soon as they open IEM Manager next.
Until they accept, their entry shows an orange clock icon in the team list, meaning pending.
Important: an invited team member must sign in with the exact email address you invited. If you invited name@gmail.com but they sign in with Apple linked to name@icloud.com, the invitation won't match. Confirm with them which email they use before sending.
08The daily workflow
Once your project is set up with gear, persons and (optionally) a team, your day-to-day looks like this:
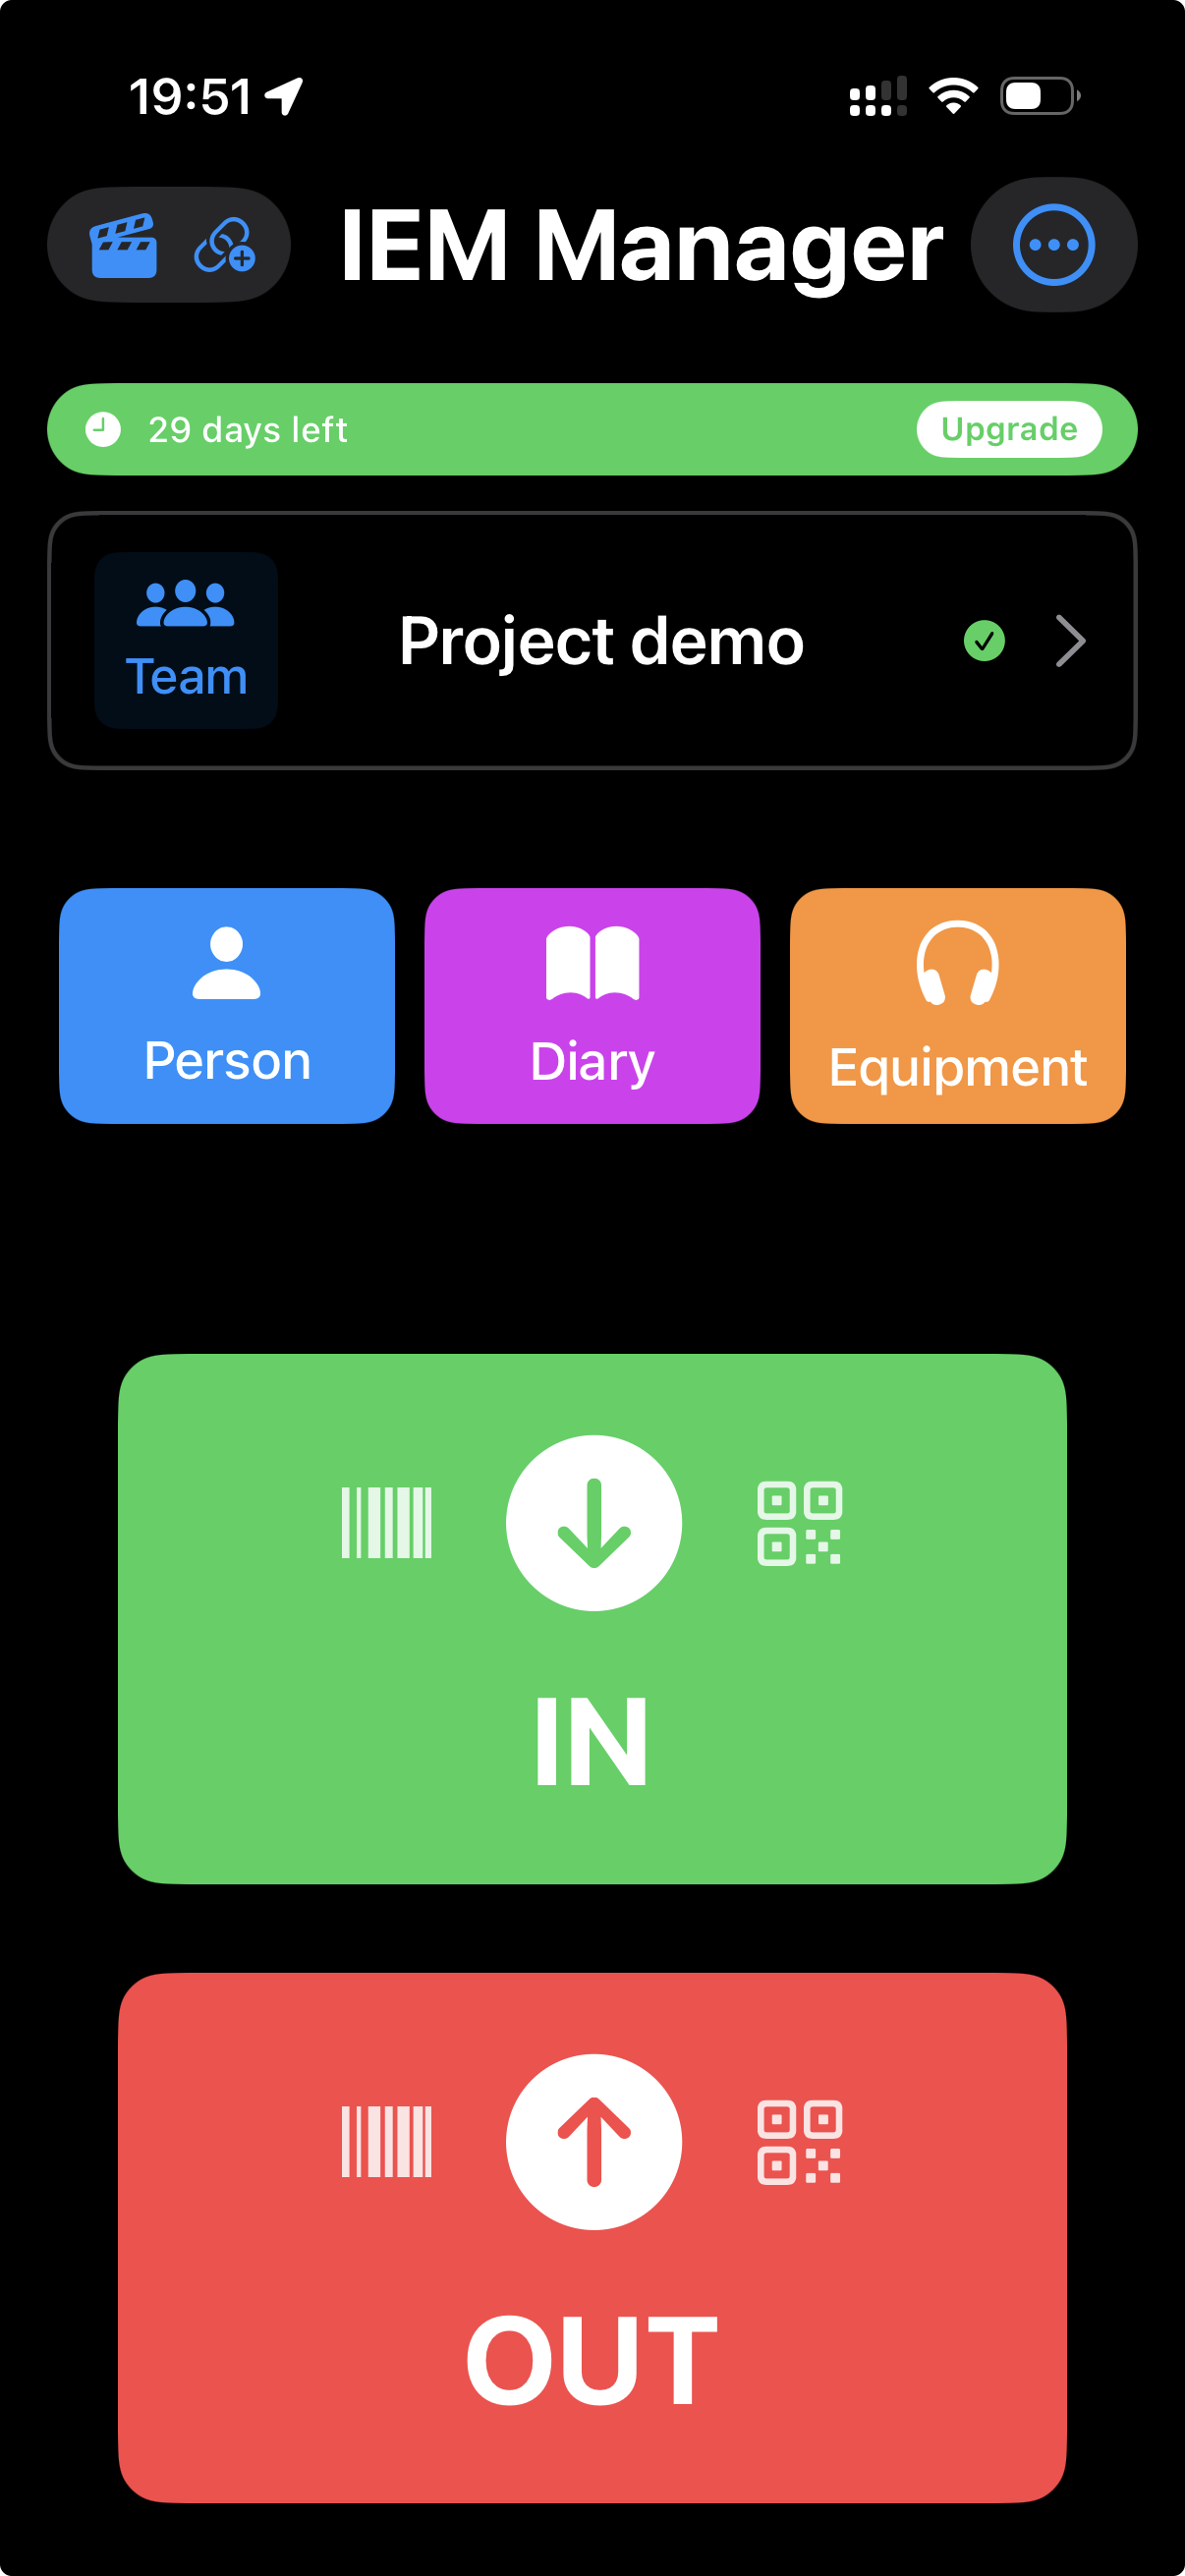
- Open IEM Manager. The home screen shows the active project, the three tabs (Person / Diary / Equipment), and two big buttons: IN (green) and OUT (red).
- To hand out a piece of gear: tap OUT, scan it, assign it to someone.
- To take a piece of gear back: tap IN, scan it.
- At end of day, tap Wrap in the diary view to close the workday.
That's the whole workflow. The next sections cover each step in detail.
The home screen at a glance
- Top bar: project picker on the left, app title in the centre, overflow menu (⋯) on the right.
- Trial banner (green/orange/red): days remaining in your free trial.
- Project card: shows the active project, with a Team button on the left.
- Three coloured tiles: Person (blue), Diary (purple), Equipment (orange).
- IN and OUT buttons: the green/red buttons used to check gear in or out.
09Check-out (OUT)
Checking gear out is the most frequent action you'll perform. Here's exactly what happens:
- Tap the red OUT button on the home screen.
- The scanner opens. Point it at the barcode or hold the iPhone near the NFC tag (see section 13).
- If the gear is recognised and currently IN, an Allocation screen appears. If it's already OUT, you'll get a warning telling you who currently holds it.
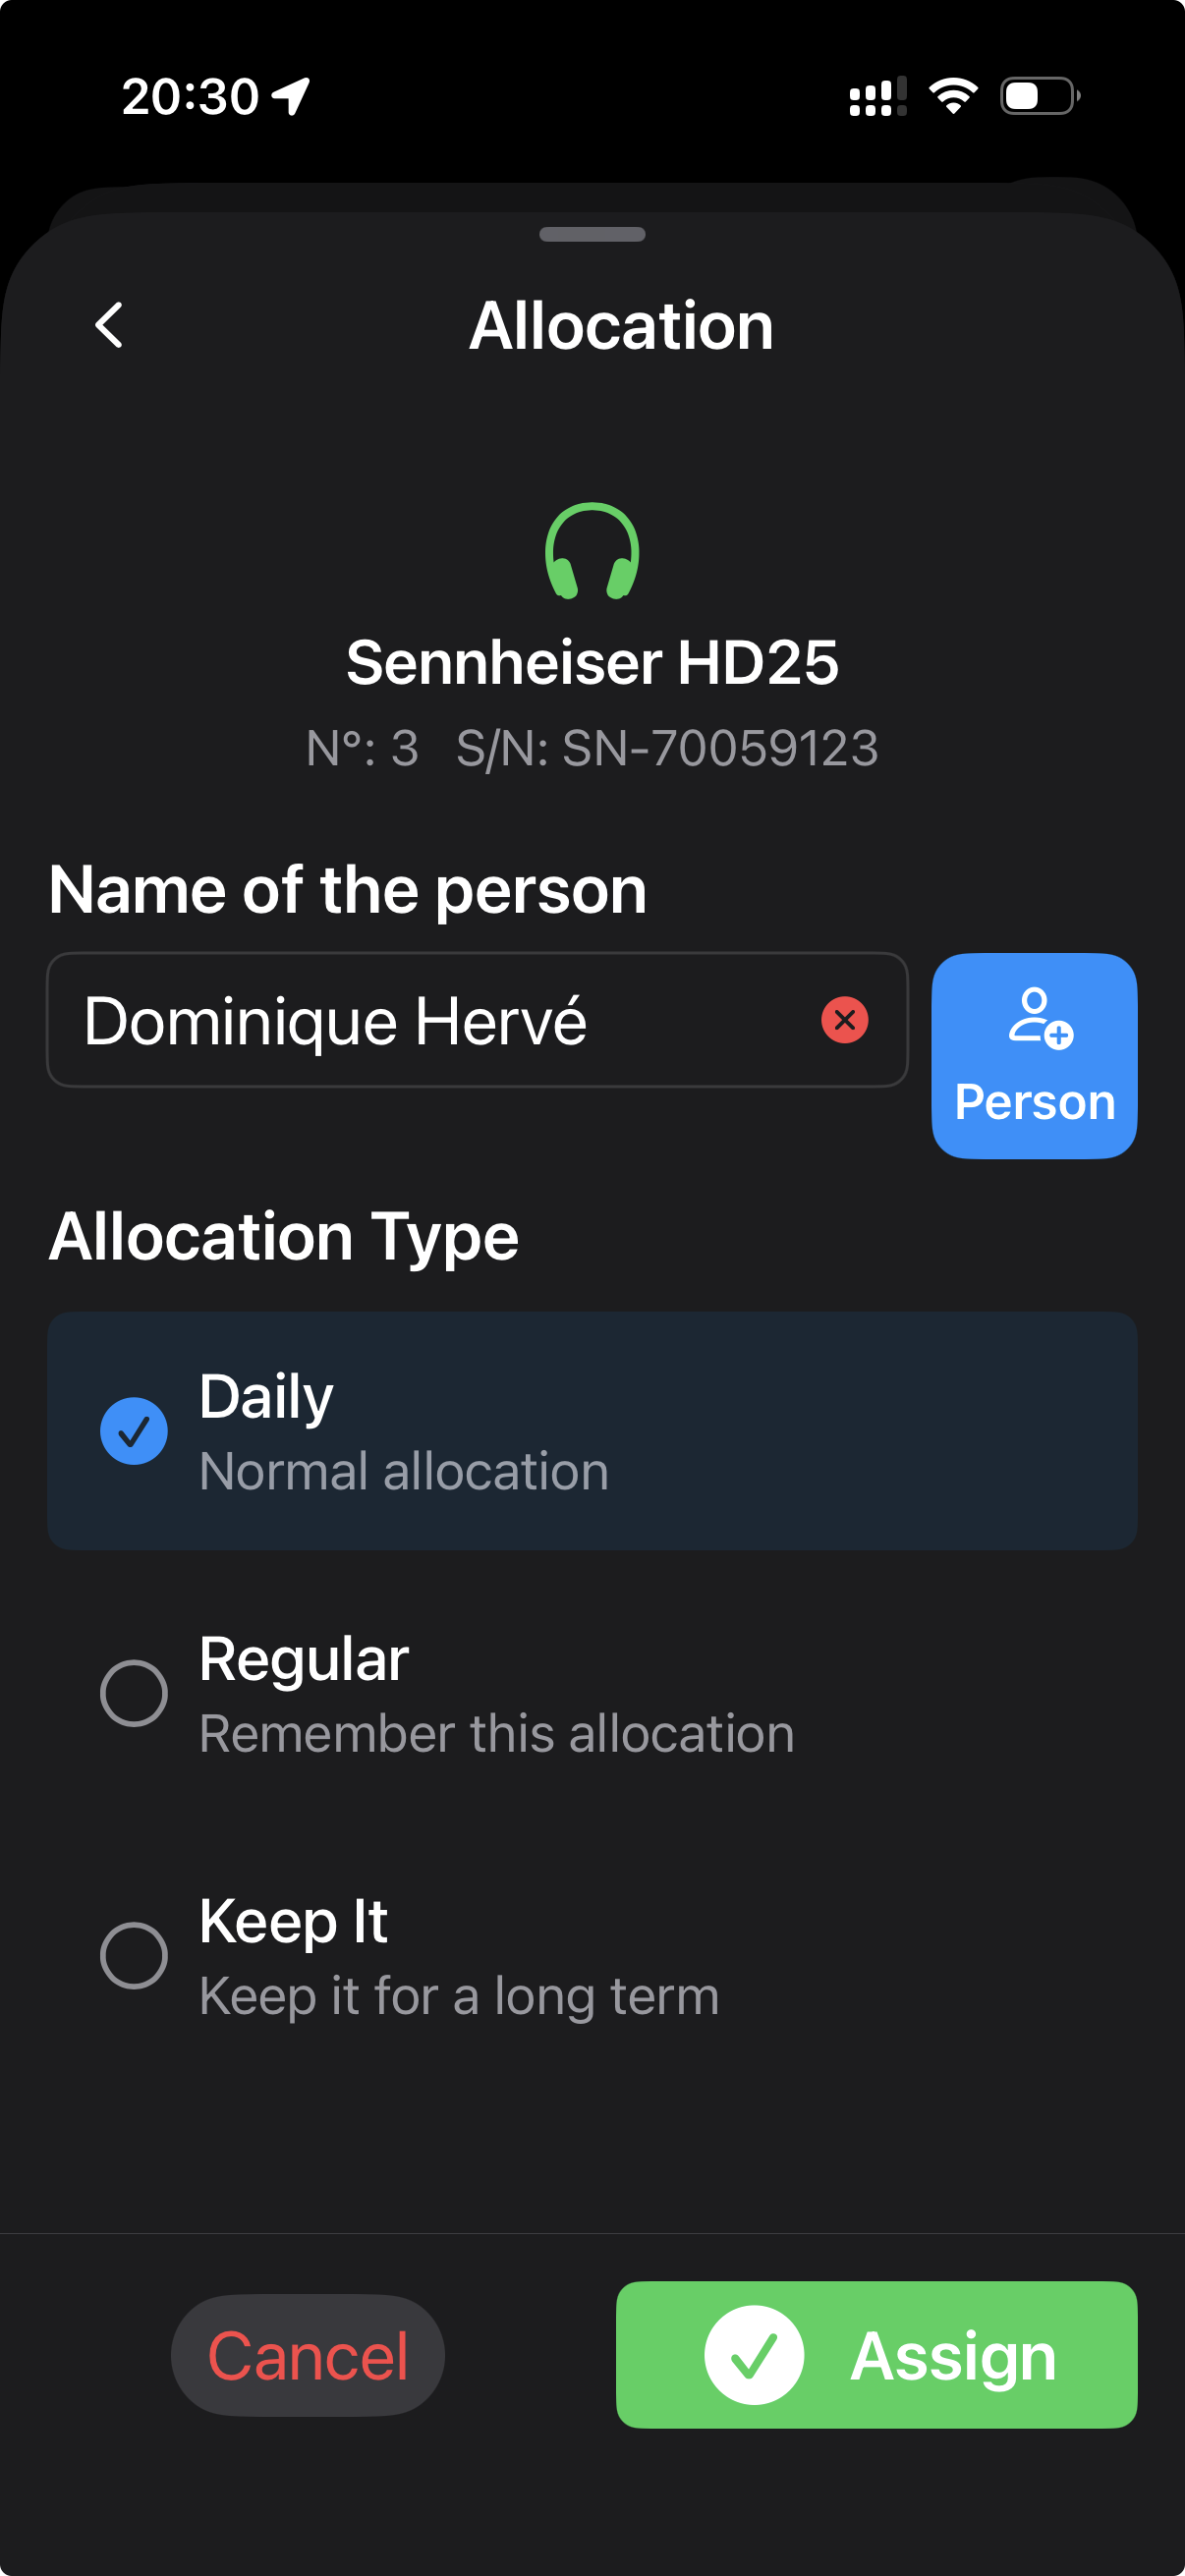
- On the allocation screen, type or pick the person's name.
- Choose an Allocation Type (see below).
- Tap Assign. Done.
The three allocation types
This is where IEM Manager differs from a simple checkout sheet. Each item leaves with a rule attached:
- Daily Normal allocation. The default. The item is checked out for today; when the workday wraps, the app expects it back.
- Regular Remember this allocation. Same as Daily, but the app remembers the pairing. Next time you start a new day, this assignment is suggested again — useful for "Sarah always uses receiver #4".
- Keep It Long-term loan. The item stays with the person across multiple days without coming back. Typical for cast members who keep their IEM throughout the shoot.
Tip: pick Keep It for actor IEMs at the start of the shoot. They won't appear in your daily check-in list, but they'll still show up in the diary under a "Keep It" section so you know who has what.
10Check-in (IN)
Check-in is the mirror operation: gear coming back into the bag.
- Tap the green IN button.
- Scan the item (barcode or NFC).
- A confirmation appears: "Return [item] from [person]?"
- Confirm. The item's status flips from OUT back to IN.
If you scan an item that's already IN, the app politely tells you so and ignores the scan. No ambiguity, no double-counting.
Bulk check-in at end of day
At end of day, you usually have a pile of gear in the bag waiting to be scanned in. Just keep tapping IN and scanning one item after another — the scanner stays open between scans, so you can blast through twenty items in under a minute.
11The diary
The Diary is the project's memory. Open it from the purple tile on the home screen. You'll see a list of workdays, with the most recent at the top.
Tap a workday to see every movement for that day, with timestamps:
- OUT movements at the top, in red, showing the equipment, the person, and the time it was handed out.
- Keep It movements grouped in a collapsible section at the bottom — gear that's still out on long-term loan, not part of today's daily flow.
The diary is read-only. It's a permanent record built automatically as you scan throughout the day.
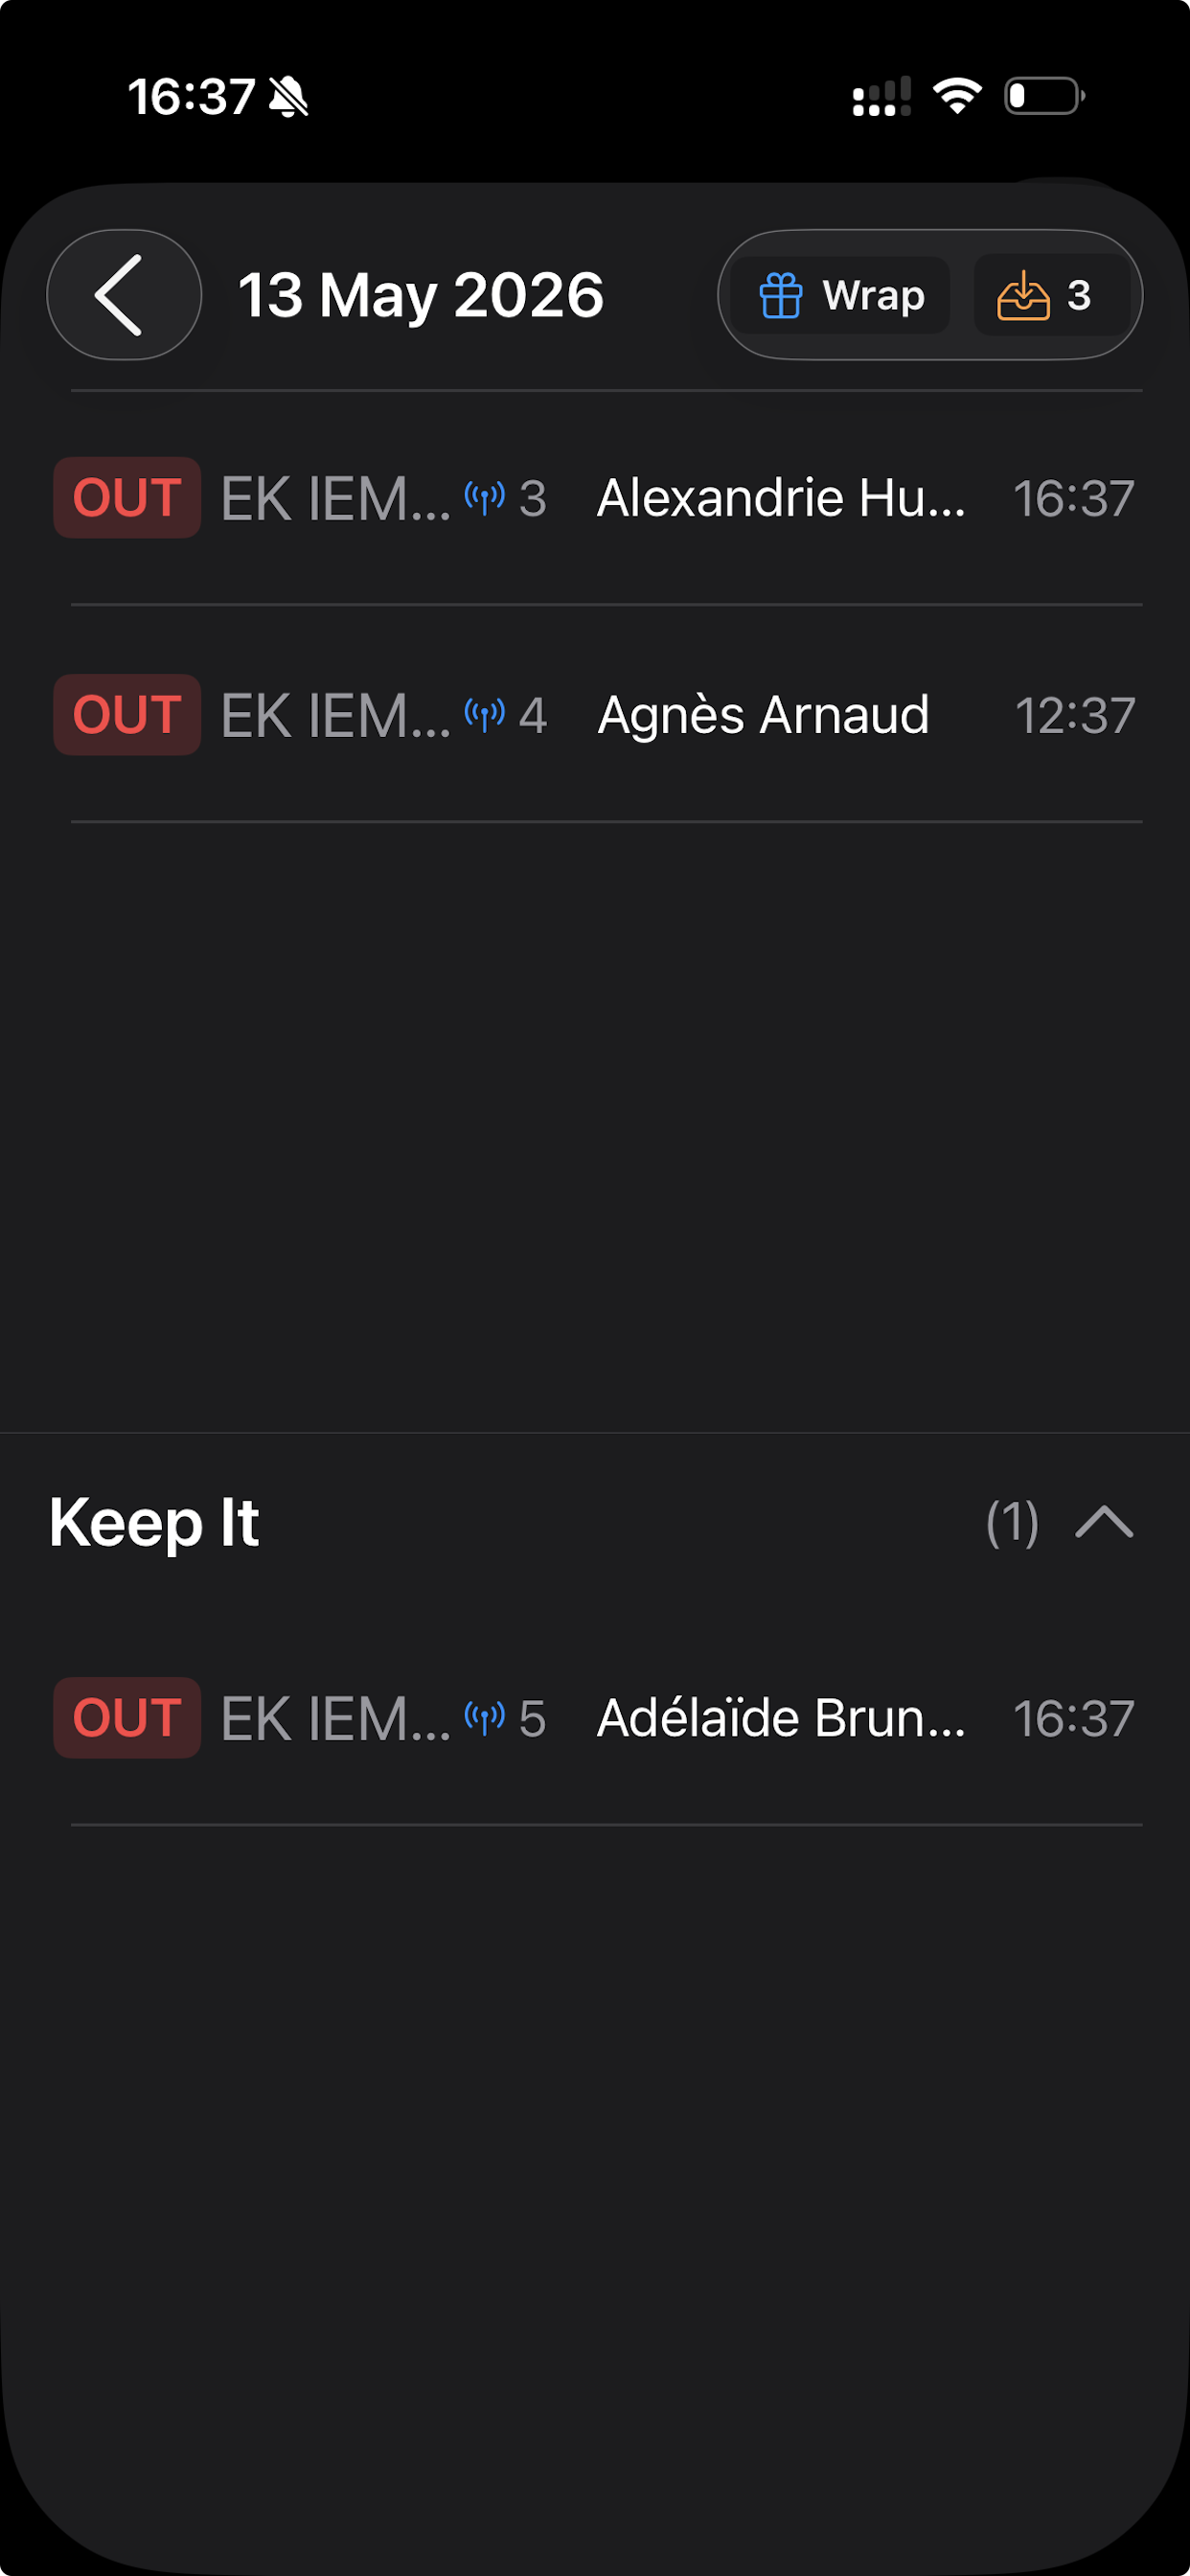
The OUT counter
The orange badge in the diary header shows the number of items currently OUT for that day. When it drops to zero (or only Keep It items remain), you know everything's accounted for and you can wrap.
12Wrapping the day
When the day is done — gear back in the bag, paperwork done — you tap the blue Wrap button at the top of the diary. This marks the workday as closed.
What happens when you wrap
- The current workday is sealed. No more movements can be added to it.
- Any item still out with a Regular or Keep It assignment stays with its assigned person — the next day will start with those assignments still active.
- Any item still out with a Daily assignment that hasn't been returned is flagged, so you can chase it down or confirm it's intentional before sealing the day.
Reopening a wrapped day
If you wrap too early, you have a 6-hour grace window to reopen the last wrapped day from the home screen. After that, a new workday is created automatically the next time you scan something.
13Scanning
IEM Manager supports two scanning methods, and you can switch between them at any time from the overflow menu (the ⋯ button in the top right).
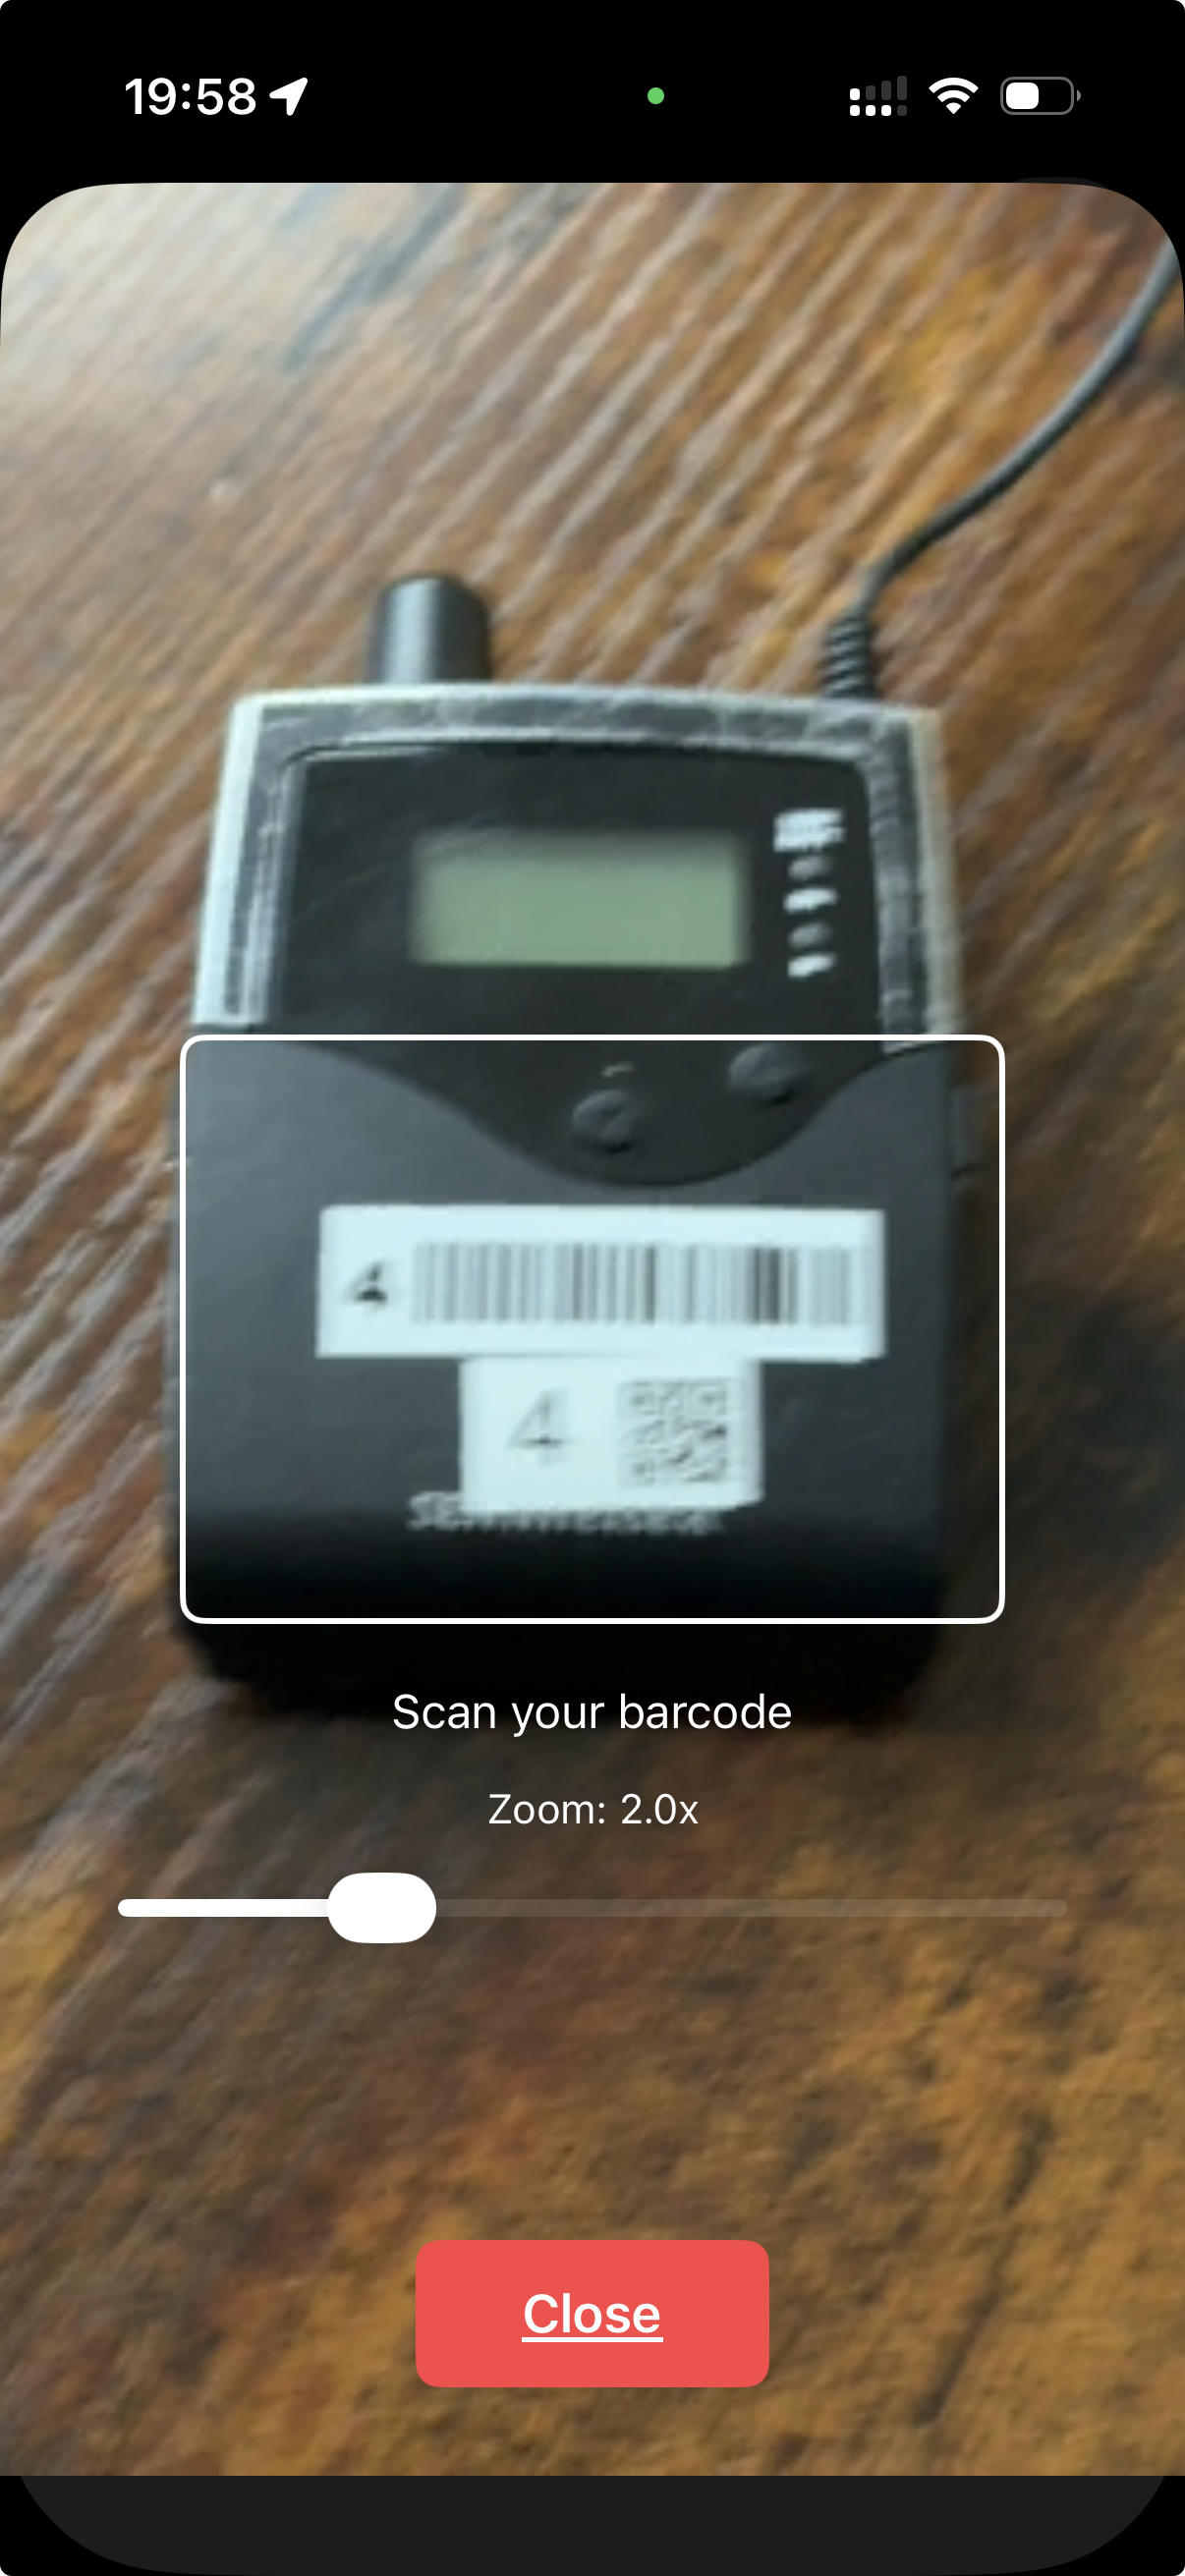
QR Code / Barcode
Works on any device with a camera. Point the camera at the code on your gear, hold steady, and the scanner reads it within half a second.
The scanner has a zoom slider for tiny barcodes — push to 2× or 3× when scanning small radio mics. There's also a torch toggle on most devices for dim sets.
Compatible with: QR codes, Code 128, Code 39, EAN-13, EAN-8, UPC-A, UPC-E.
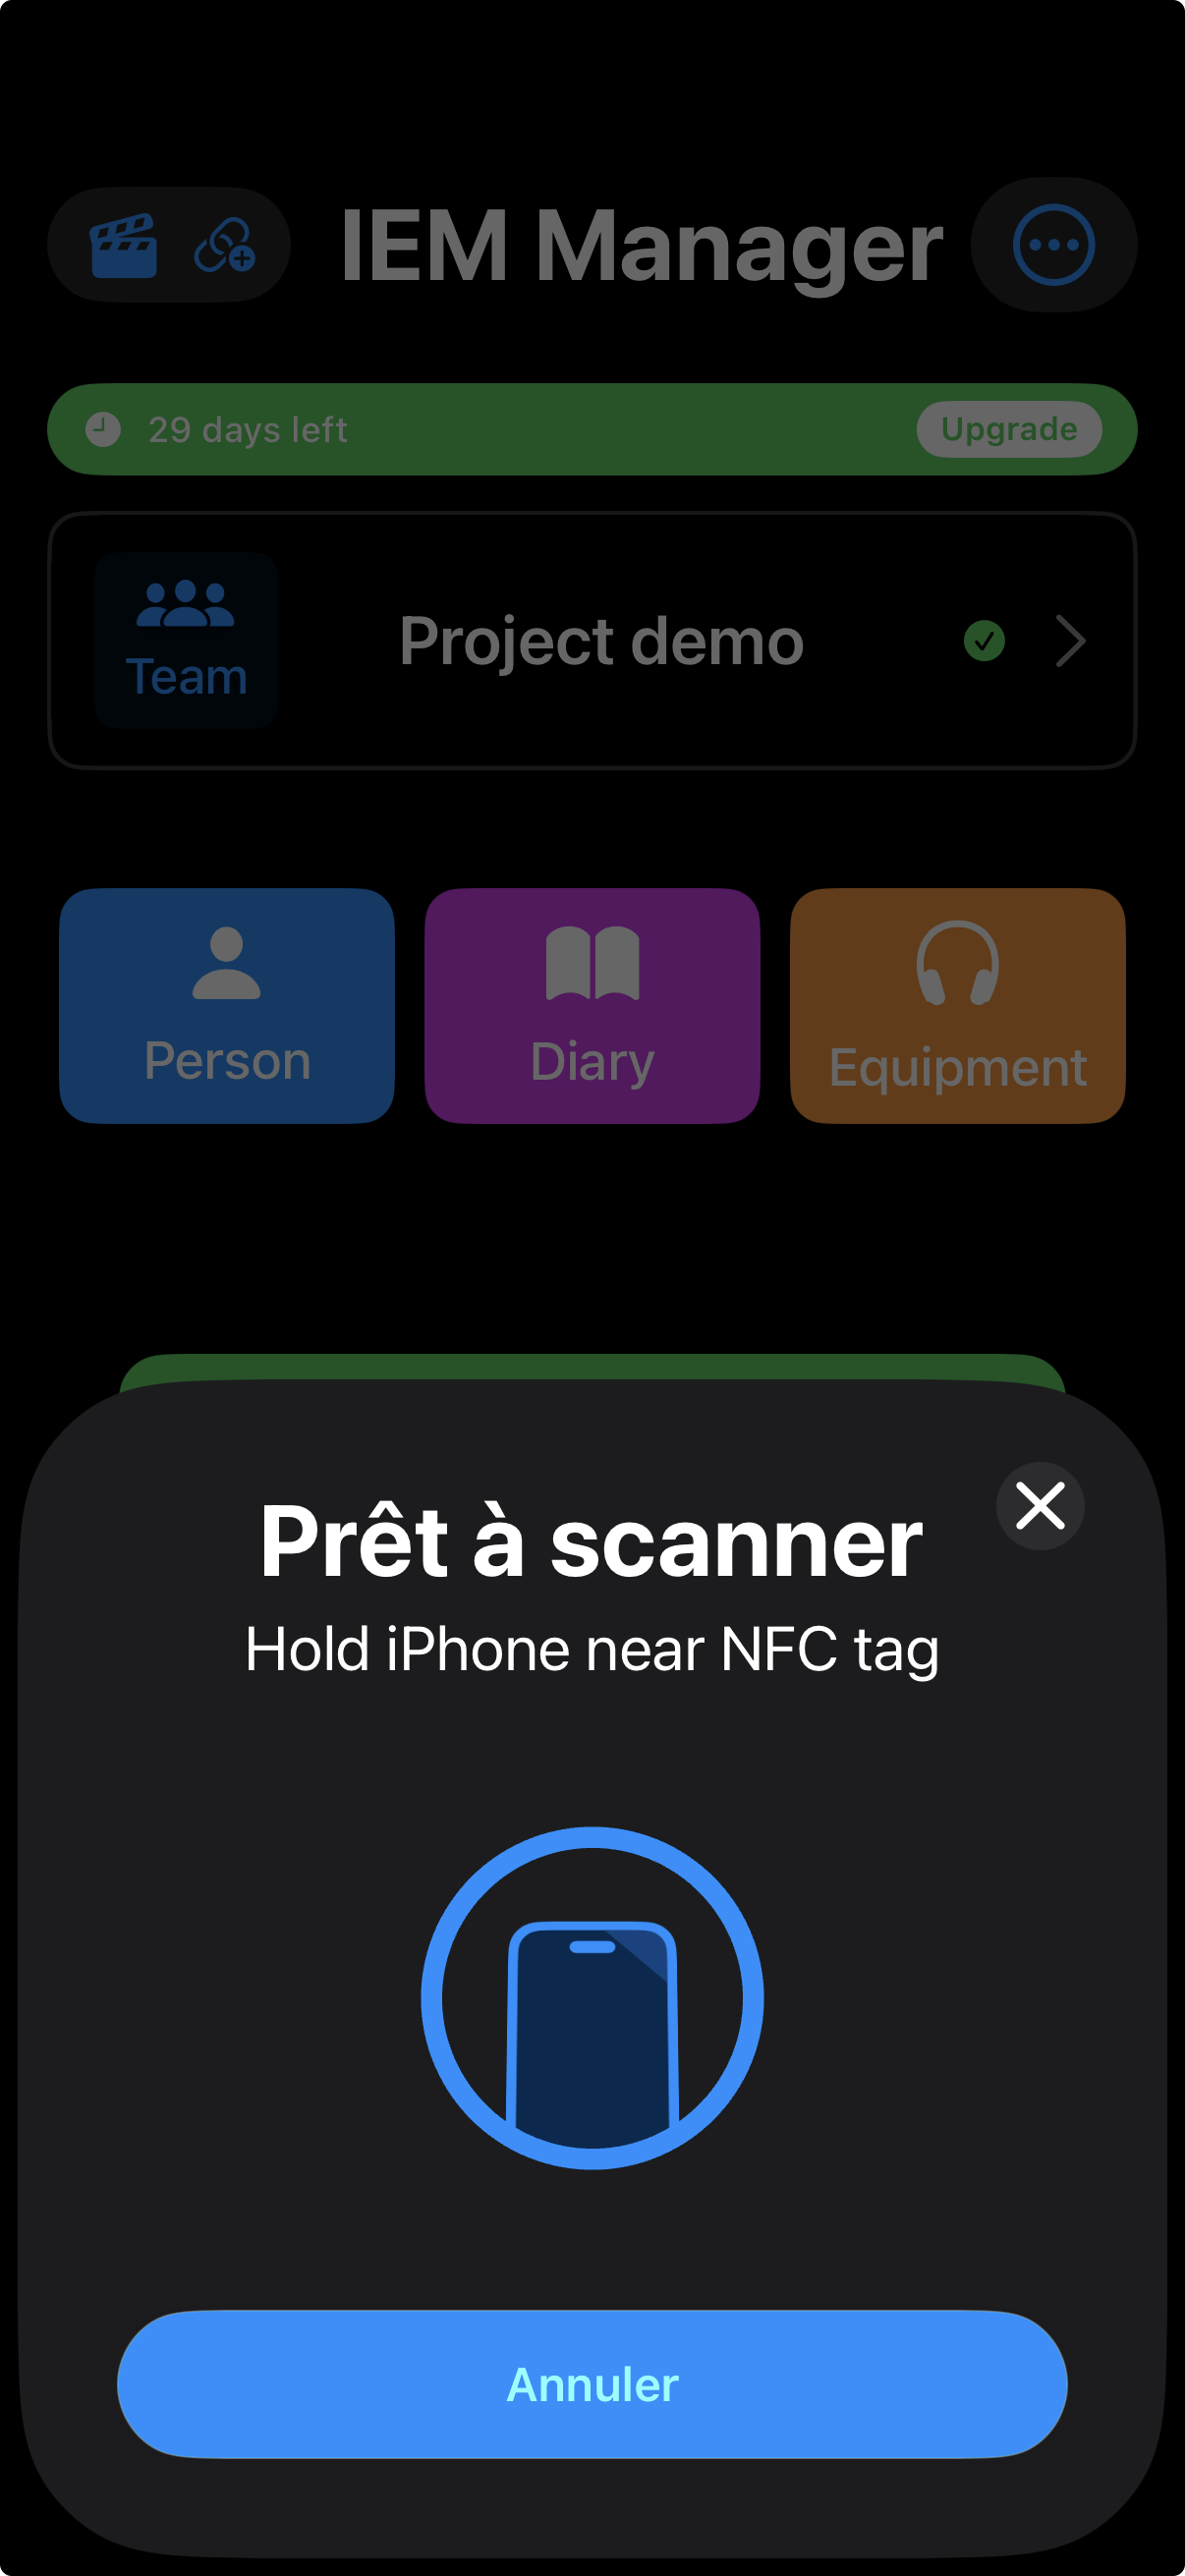
NFC Tag
Faster and more reliable than the camera once you've equipped your gear with NFC stickers. Just hold the iPhone (or compatible Android device) within a few centimetres of the tag — the system pops up a "Hold near NFC tag" sheet, the tag reads instantly, and you're back in the app.
NFC works in the dark, doesn't need to be aimed precisely, and doesn't care about scratched or dirty labels.
Hardware note: most NFC tags from any supplier work (NTAG213/215/216). Stick them on the back of receivers or under the bag pouch. Each tag costs a few cents and can be re-written if you reassign gear later.
Switching modes
Tap the overflow menu (⋯) and choose Scanner or NFC. A checkmark shows the current mode. Your choice is remembered across app restarts.
14Limits & rates
Admin-only feature. If you're the project creator (or were promoted to admin), open the overflow menu (⋯) and pick Limits/Rates.
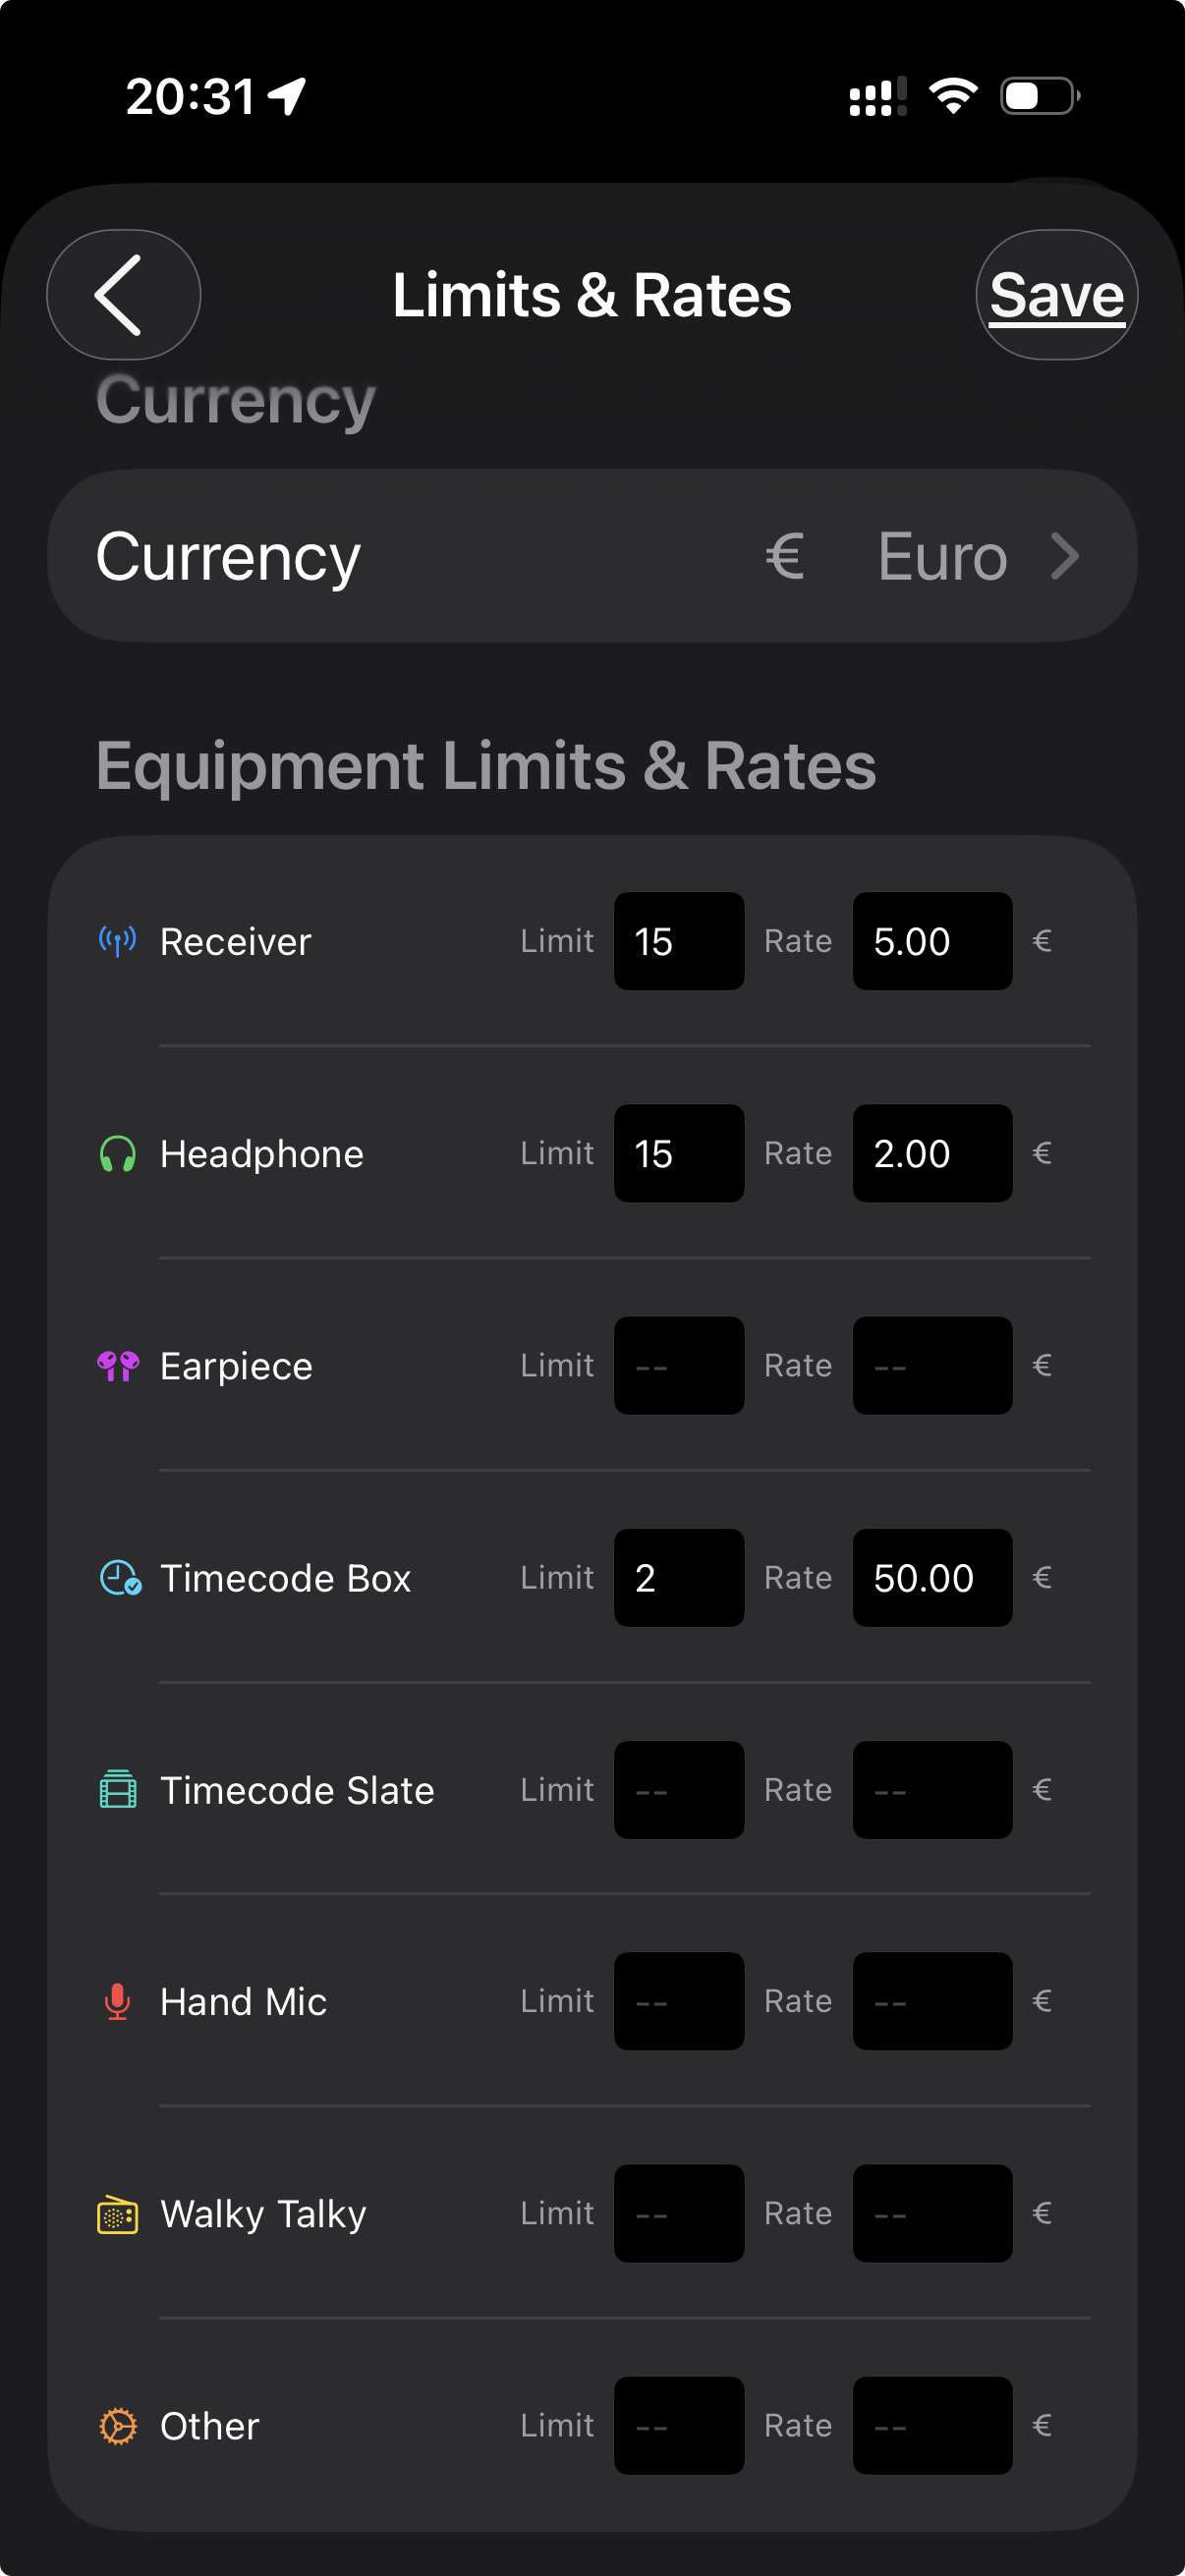
This screen lets you set, per equipment type:
- A daily limit — the maximum number of units the project owns. The app warns you if you somehow check out more than this (typically because of a data entry mistake).
- A daily rate — the price per unit per day, used when generating cost reports.
The currency picker at the top supports 30+ currencies (EUR, USD, GBP, JPY, AUD…). Pick the one your production uses.
Equipment types covered
Receiver · Headphone · Earpiece · Timecode Box · Timecode Slate · Hand Mic · Walky Talky · Other.
The "Other" bucket catches anything that doesn't fit a standard category — bag straps, cables, batteries — though most users leave Other empty and add those items individually to a separate inventory.
Why bother?
Most freelance sound mixers don't track rates per item per day in real time — they bill flat day rates. But on long shoots or when you're renting in extra gear on top of your kit, knowing exactly how many receiver-days were used over the shoot is the difference between a clean invoice and an awkward conversation with the production manager.
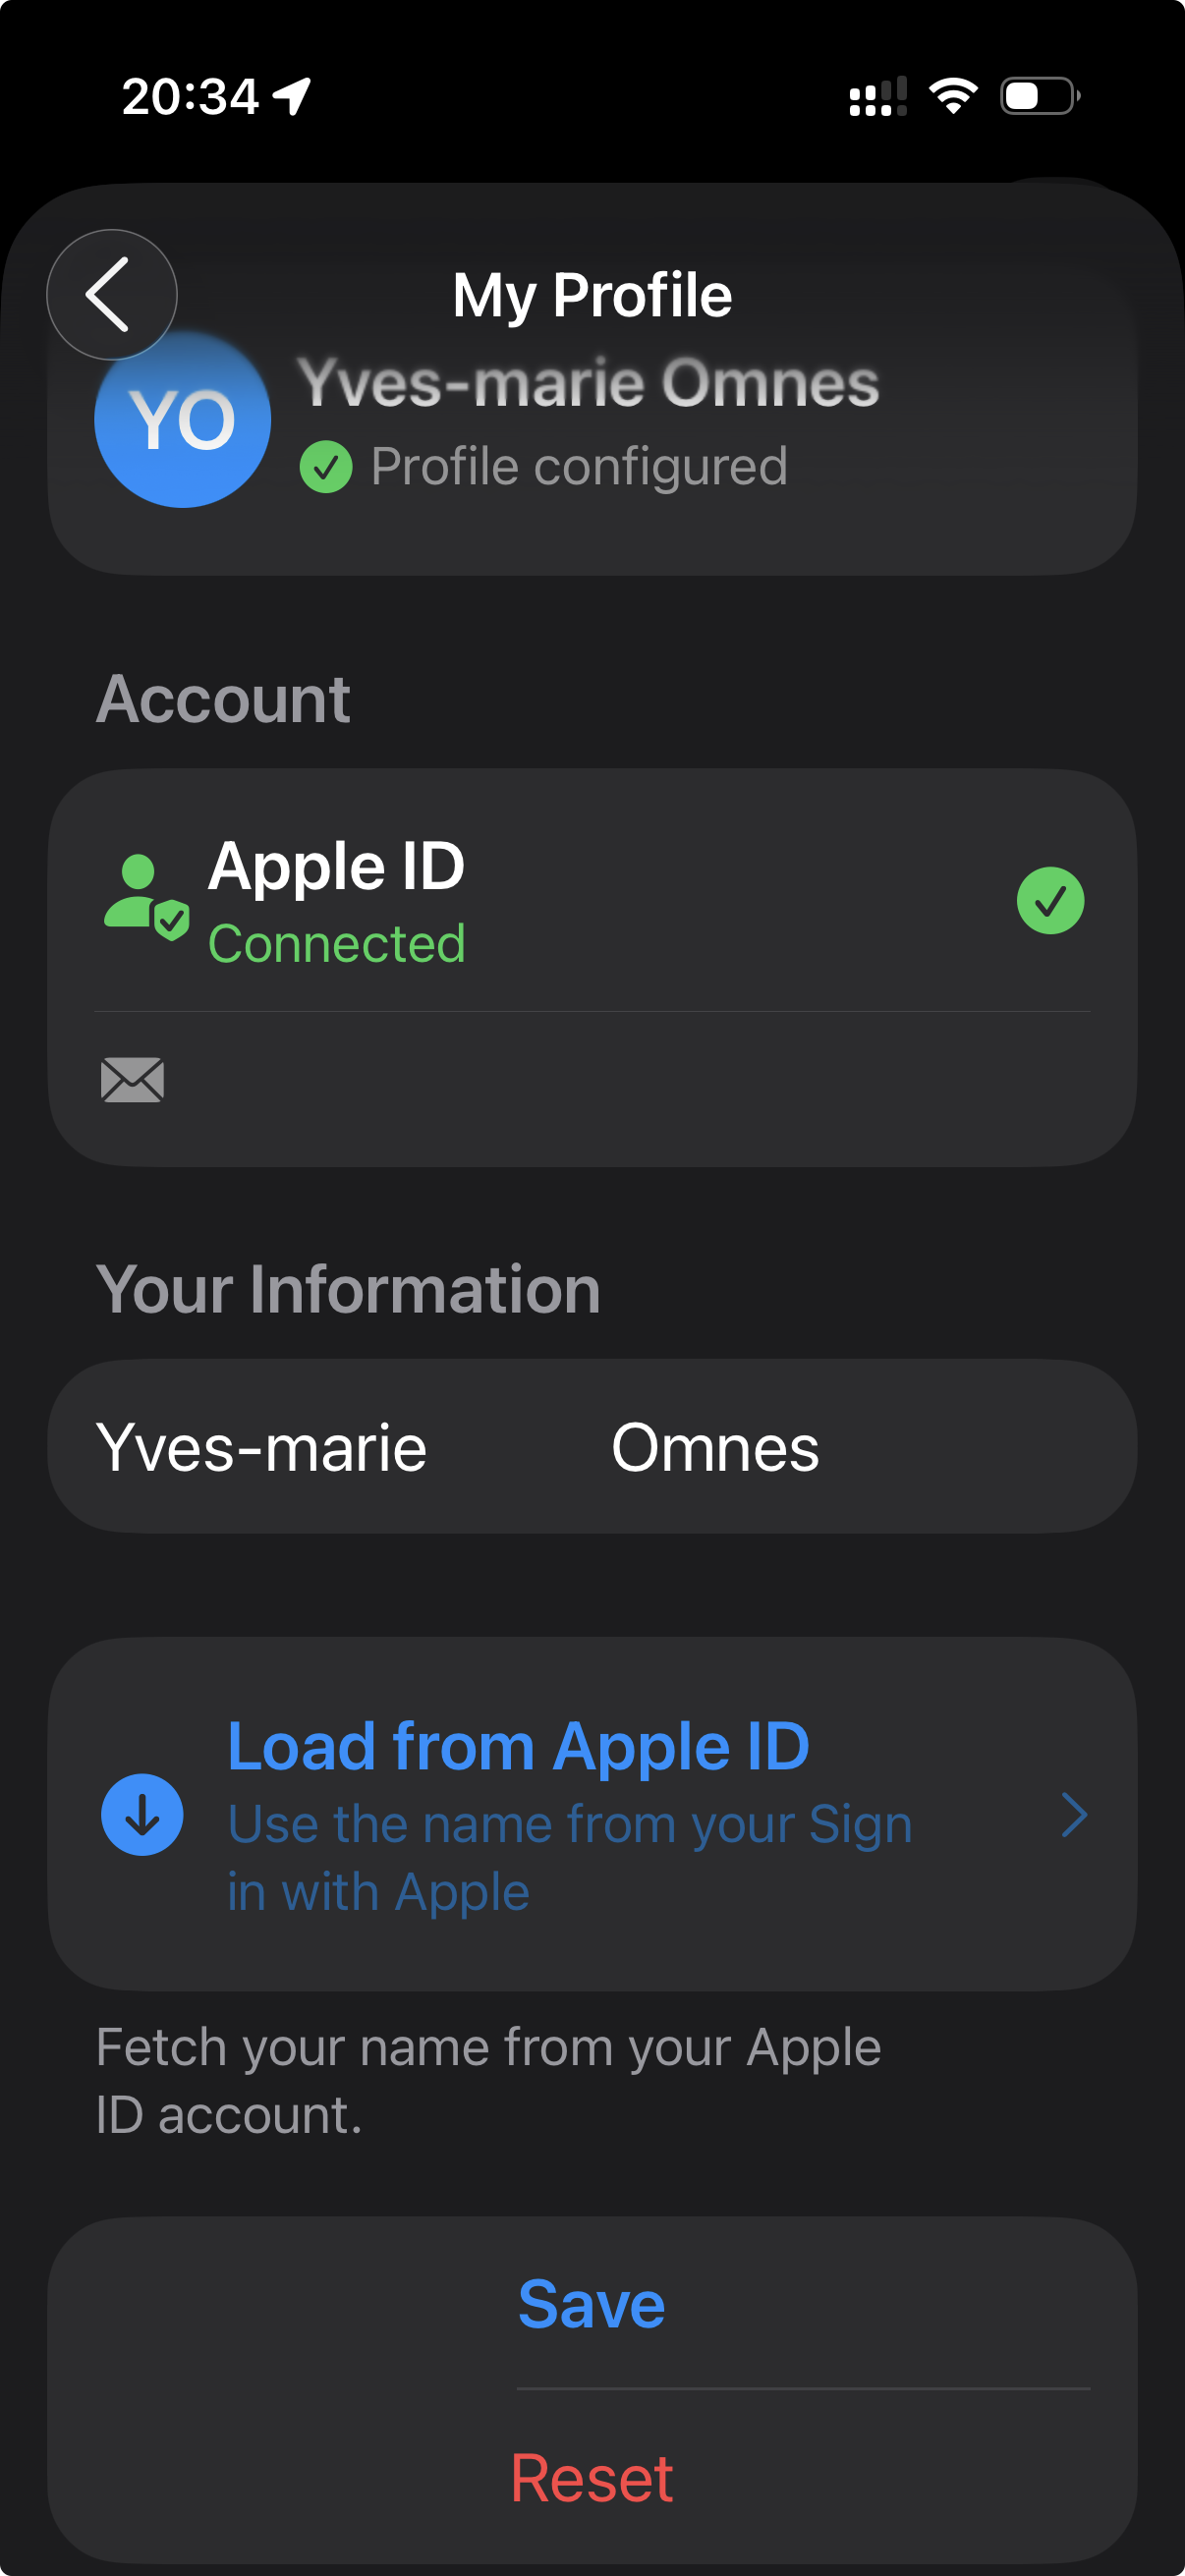
15Profile & account
From the overflow menu, tap Profile. You'll see your account information and a couple of editable fields.
What's editable
- First name and last name — used in invitations and in the diary when you're the one checking gear out.
- Tap Load from Apple ID (or Load from Google if you signed in that way) to auto-fill your name from your sign-in account.
- Save writes your changes. Reset reverts them.
What's read-only
- Your sign-in provider (Apple or Google) and the email address attached to it.
- The app version, shown at the bottom of the screen.
Signing out
Sign out from the overflow menu's Sign Out item. The next sign-in takes you back to the welcome screen — your data isn't lost; it stays in the cloud, attached to your Apple ID or Google account, and reappears as soon as you sign back in.
Deleting your account
If you want to permanently delete your account and all associated data, scroll to the bottom of the Profile screen and tap Delete Account. Full details on the deletion process are on our account deletion page.
16Subscription
IEM Manager is a paid subscription, with a generous 30-day free trial that requires no credit card. After the trial, two plans are available:
| Plan | Price | Best for |
|---|---|---|
| Monthly | 7.99 € / month | Short shoots, occasional users. |
| Yearly | 69.99 € / year (≈ 5.83 €/month) | Regular use, full-time production sound mixers. |
Restore purchases
If you switch device, reinstall the app, or sign out and back in and the subscription doesn't appear immediately, tap Restore Purchases at the bottom of any paywall screen. This forces a refresh against the App Store (or Play Store) and brings your subscription back.
Managing your subscription
To upgrade, downgrade, or cancel, use your platform's standard subscription management:
- iOS: Settings → Apple ID → Subscriptions → IEM Manager.
- Android: Play Store → Account → Subscriptions → IEM Manager.
For convenience, the overflow menu in the app has a Manage Plan shortcut that opens the right page directly.
Cancelling does not delete your account. If you cancel your subscription, you'll lose access to features after the current billing period, but your data stays untouched and you can resubscribe at any time. To delete your data entirely, see the account deletion page.
17About & legal
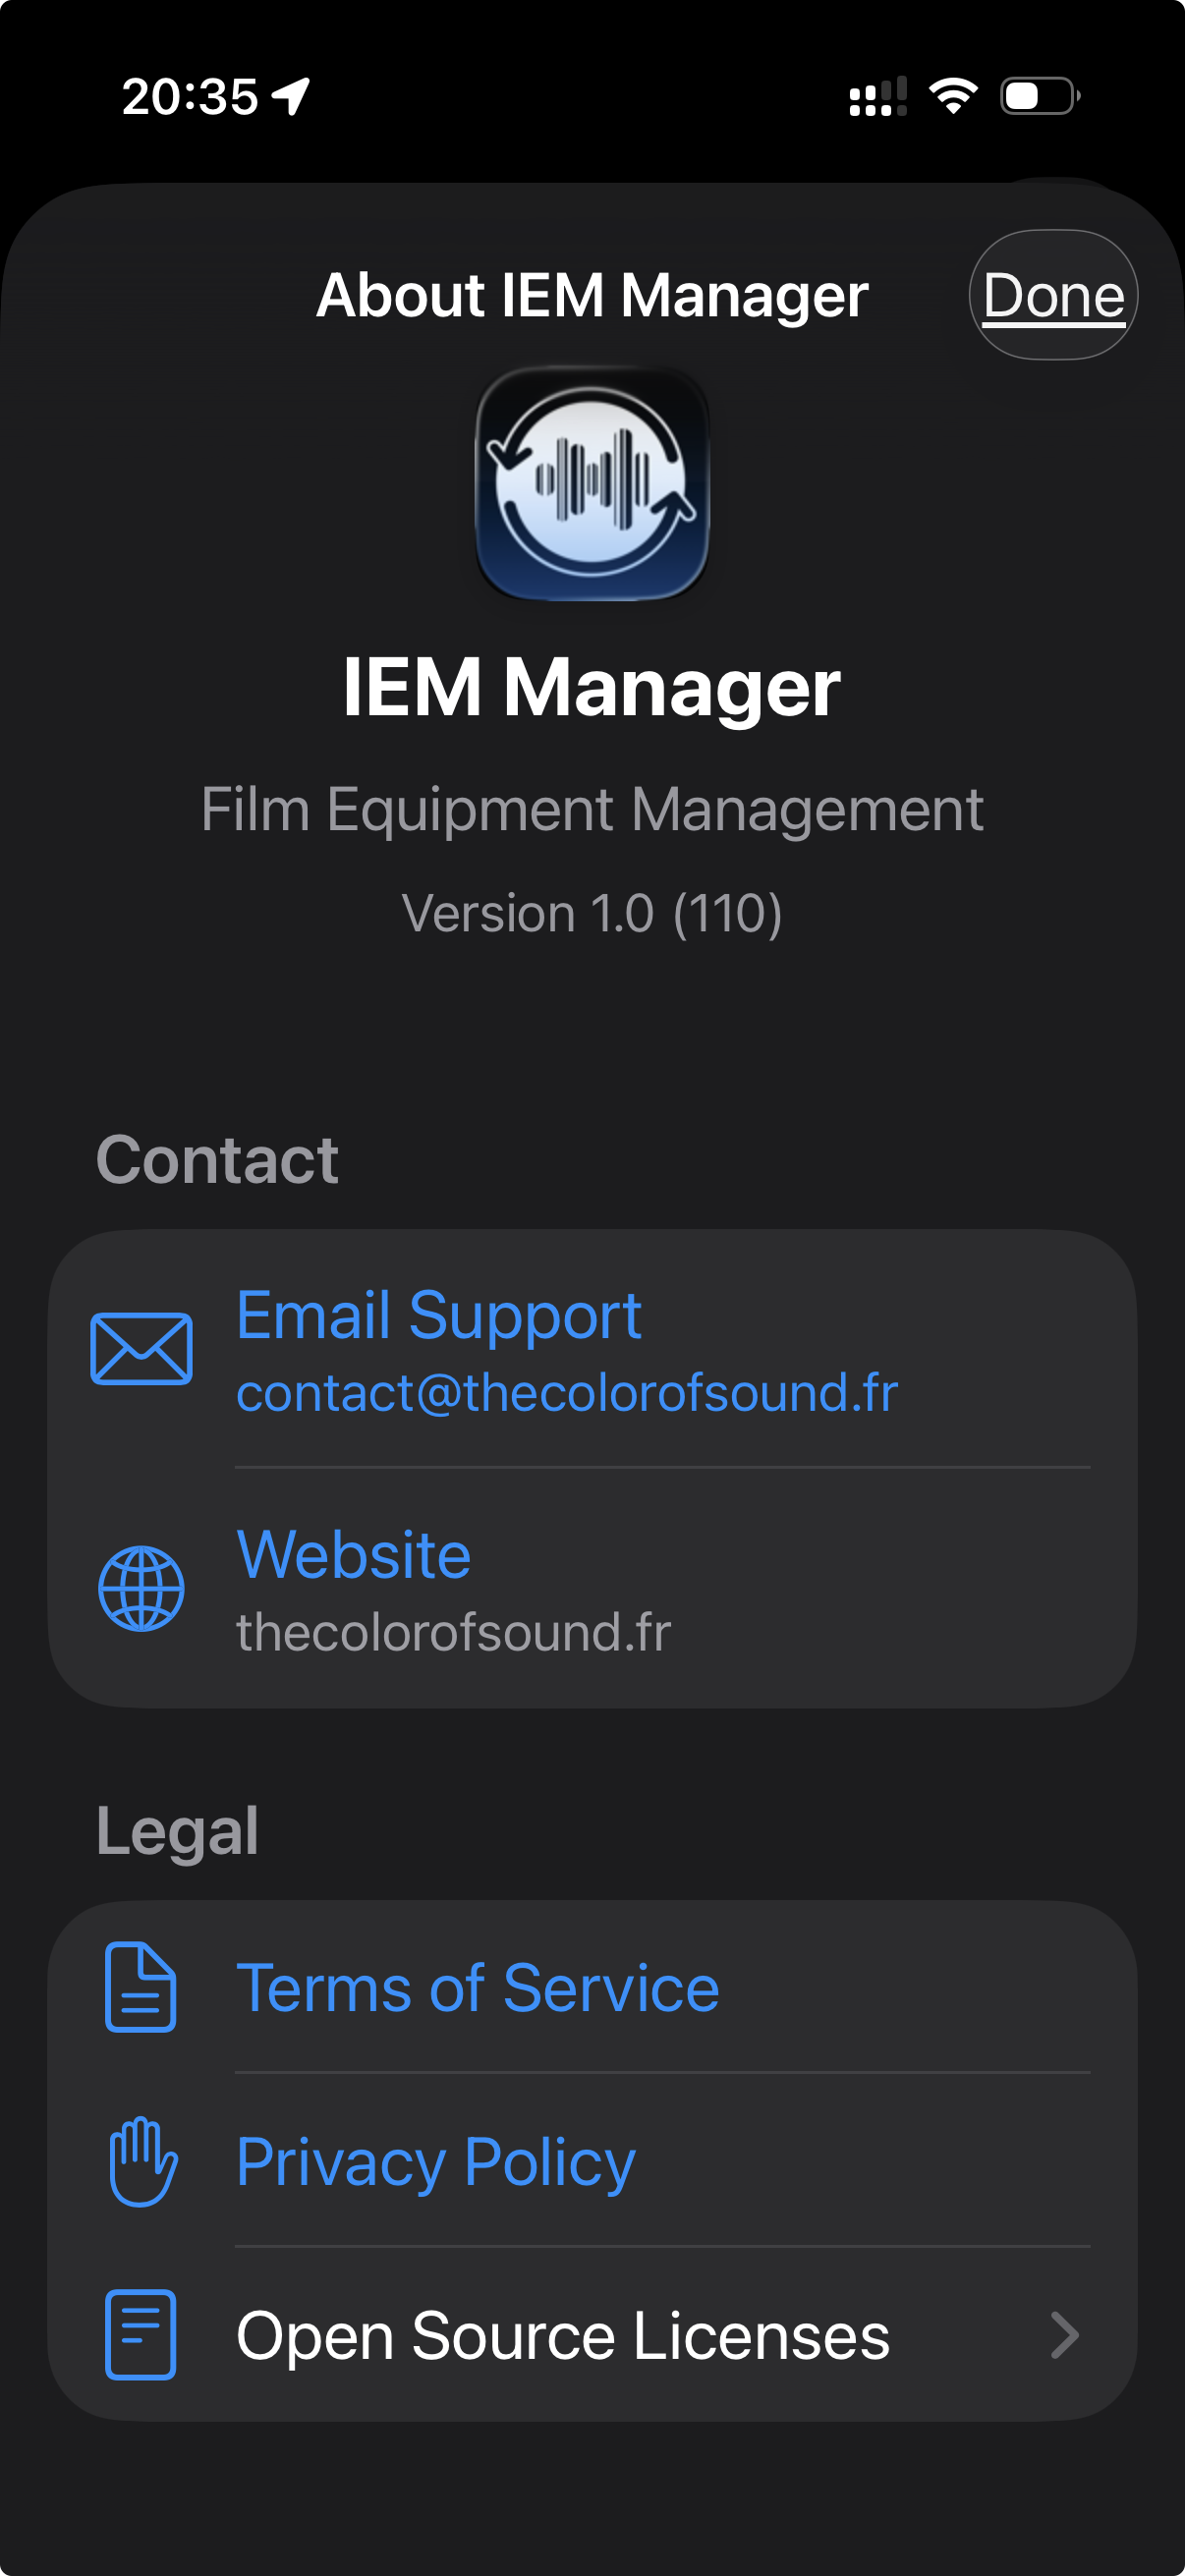
The About screen, opened from the overflow menu, contains the app version, build number, and quick links to:
- Email Support — opens your mail app pre-addressed to contact@thecolorofsound.fr.
- Website — opens thecolorofsound.fr.
- Terms of Service, Privacy Policy, Open Source Licenses.
If you ever need to share a bug report or feature request, including the version number from this screen makes our life much easier.
18FAQ
Can I use IEM Manager offline?
Partially. The app works offline for browsing your inventory, persons, and past workdays. Scans, check-outs and check-ins require a network connection to sync to the cloud and keep your team aligned. If your set has spotty signal, the app queues actions and syncs as soon as connectivity returns — but we recommend a stable connection during the shoot day.
What happens if two team members scan the same item at the same time?
The cloud database resolves the conflict automatically. The first scan to reach the server wins. The second device gets a friendly "already checked out" message and the diary stays consistent.
Can I import equipment from a spreadsheet?
Bulk import is not part of the V1 release. For now, equipment is added one item at a time. We're working on a CSV import feature for a future update.
Does IEM Manager generate PDF reports?
Report generation is on our roadmap. The diary keeps every movement permanently, so when reporting ships, you'll be able to retroactively generate reports for any past project.
I lost my phone mid-shoot. How do I keep going?
Sign in on any other iOS or Android device with the same Apple ID or Google account. All your projects, gear, persons and team appear within seconds. Your subscription comes with you too — tap Restore Purchases if it doesn't show up immediately.
Can a User-role team member promote themselves to Admin?
No. Only an existing Admin can change roles. This is intentional, to prevent accidental or malicious privilege escalation.
What happens to my data when my subscription ends?
Your data is not deleted. You retain read-only access to your projects, persons, and diary, but you can't add new movements until you resubscribe. Once you resubscribe, full functionality returns instantly.
Can I use the app for non-sound gear (camera, lighting)?
Technically yes — the equipment categories include "Other", and the workflow works for any item with a serial number. But the predefined types (Receiver, Headphone, IEM, Timecode Box, etc.) are sound-specific, so it's optimised for production sound. If you need camera or lighting tracking, get in touch — we'd love to hear how you'd want it to work.
Why does the trial banner change colour?
Green = more than 7 days remaining. Orange = 7 days or less. Red = the trial is about to expire. Once the trial ends, the banner is replaced by a paywall asking you to subscribe.
Is my data encrypted?
Yes. All data is transmitted over TLS and stored encrypted at rest on Google Cloud (Firestore). Authentication is delegated to Apple and Google — we never see or store your password.
19Support
Got stuck, found a bug, or want to suggest a feature?
- 📧 Email: contact@thecolorofsound.fr
- 🌐 Website: thecolorofsound.fr
When reporting a bug, please include:
- Your device model and OS version (iPhone 15 Pro, iOS 18.4 — that sort of thing).
- The app version, available from About in the overflow menu.
- A short description of what you were trying to do and what happened instead.
We read every email and reply within a few working days.